Last Updated on October 1, 2023 by Vinson Lozano

If you own a bike, chances are you would have had to deal with the problem of a loose bike chain at some point. If you don’t know how to shorten bike chain, it’s a difficult job to get it back to the right size. However, with the right tools, you can do it yourself and save the hassle of taking your bike to the local mechanic. This article will cover everything you need to know to shorten bike chain.
Why it’s important to know how to shorten a bike chain
Proper chain length is crucial for your bike’s performance. Having your chain at the ideal length ensures optimal power transfer, which leads to a smooth and efficient ride. So, knowing how to shorten a bike chain is an invaluable skill to master.
Essential tools for the job
You’ll need a chain tool. This small, handheld device allows you to remove links from your chain. A chain tool has a small, pointed tip which pushes the pin out of the chain link. Some other handy tools are a pair of pliers and a rag to clean up afterward.
To begin, place the chain in the chain tool, aligning the tool’s pin with a pin on your bike chain. Then, turn the handle of the chain tool, which will push the pin out and separate the chain link. Repeat this process until the chain is the desired length. Remember to always double-check your work to avoid over-shortening. And voila! You’ve successfully shortened your bike chain.
So, next time you feel your bike’s performance is lagging because of a stretched out chain, you’ll know just what to do!
Preparing Your Bike Chain
Whether you are fixing up your old bike or installing a new one, it’s essential to get the bike chain length spot-on. Here’s how you can get the perfect length and later on, smoothly cruise on your two-wheeler.
Measuring the chain length
Grab your trusty measuring tape and measure your bike chain’s length. It’s crucial to stretch out the chain completely before taking measurements. Compare your numbers with the manufacturer’s recommended length; in most cases, this falls around 12 inches for every 24 links.
Determining the number of links to remove
Once you have correctly measured the length of the chain, you should tally this against the bike manufacturer’s specifications. Remember, too long, and your gears might not catch the chain properly. Too short, and the chain might be too tight, causing strain on your bike parts.
This process might seem daunting at first, but don’t worry. The perfect way to determine how much to shorten the bike chain is to lay it out on a flat surface, line up a ruler, and then start counting the links. Remember to count every inner and outer link as one.
Next, subtract the number of your counted links from the manufacturers’ suggested length to get the total number of links to remove. Want a hassle-free ride? Then don’t skip this minor maintenance step!
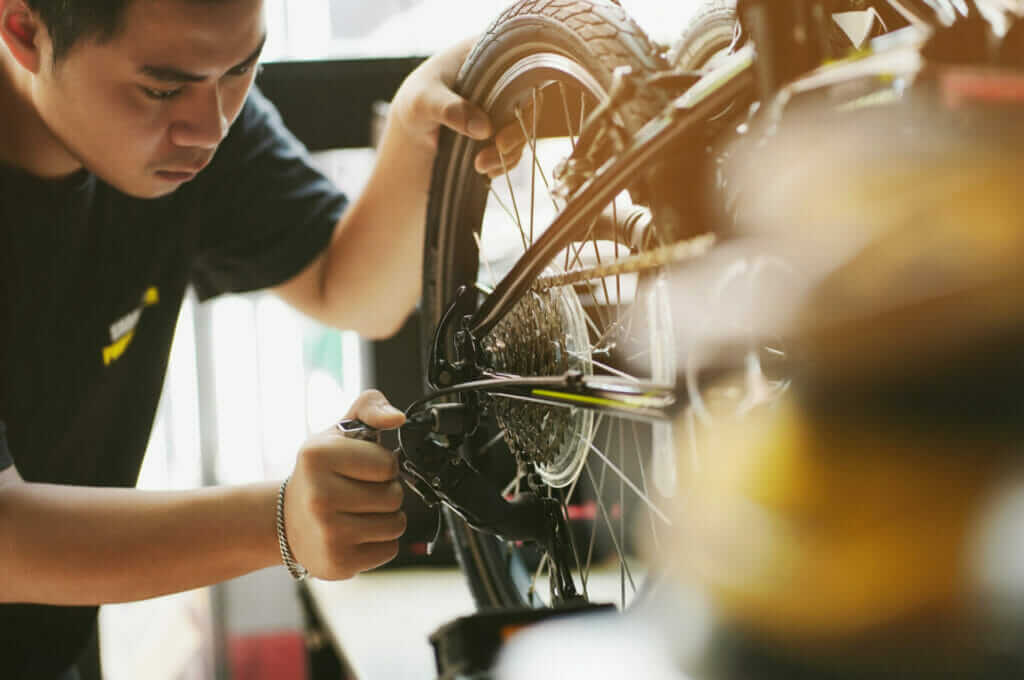
Removing Excess Links
As a bike enthusiast, you know how critical it is to maintain the correct chain length on your bicycle for optimum performance. So, how can you properly shorten a bike chain? The prime tool you will need is a chain breaker tool.
Using a chain breaker tool
The chain breaker tool is your best friend when it comes to adjusting the length of your bicycle chain. This handy device allows you to easily remove links from the chain.
To use this tool to its full potential, you’ll need to identify the link you want to remove. Then, position this link on the chain breaker’s metallic ridge and turn the handle to push the chain pin out. But hold on, don’t fully remove the pin!
Step-by-step process of shortening the chain
- Measure Twice: Before removing any links, make sure to completely wrap the chain around the largest front and rear gears. The point where the chain meets is where you should consider breaking it.
- Cut Once: Use your chain breaker tool to push the pin in the designated place.
- Reconnect: Line up the free links and apply force to the pin to push it back in. But do take note, don’t push it too far. It should be equally protruded on both sides.
By following these steps, you can easily adjust your bicycle chain length to your preference.
Reconnecting the Chain
Feeling daunted about resizing your bike chain? No need for worries. Follow these simple steps, and you’ll be back on the bike in no time.
Reattaching the chain ends
First, you’ll need to reconnect the bike chain ends. Grab your chain tool and place the chain back into position. Once secured, take the pin you pushed out earlier and insert it back into the links. Turn the chain tool handle to push the pin back into the link until it positions centrally. Ensure that you don’t push the pin too far, or you might need to start the process again.
Ensuring proper alignment and tension
Once the pin is back in place, you can check the alignment and tension. The chain shouldn’t be too tight or too loose. A slight slack is just what you need. To check the alignment, thread the chain back onto the gears and pedal slowly. Watch how the chain moves over the gears. It should transition smoothly for each pedal stroke.
Remember: Using your bicycle right after adjusting the length of the bike chain should be done gently; it helps ensure the pin is fixed correctly and nothing loosens while riding.
Voila! You just successfully shortened your bike chain.
Testing and Fine-tuning
So you’ve managed to shorten your bike chain, but you’re not quite finished yet. It’s time to test and fine-tune your work to ensure your bike is running optimally.
Checking the chain’s functionality
Yes, your work isn’t done, and the first step is to check the functionality of your chain. Start by manually rotating the pedals forward at a slow steady pace. You want to look and listen closely at your chain as it moves around the gears. Is it moving smoothly? Any unusual sounds? A properly functioning chain will smoothly transition across the gears with minimal noise.
Adjusting the gears if necessary
Your bike’s performance is directly influenced by the relationship between the chain and the gears. It’s vital to check out the derailleurs and possibly adjust them. Derailleurs are responsible for smoothly and accurately shifting the bike chain from one gear to another. If you notice your chain struggles to shift between gears or perhaps it’s skipping gears, this might be an indicator that your gears need a bit of adjusting.
Here’s a quick tip: be gentle with the adjustments. Small increments can make a significant difference. Use your bike’s gear shifters to test the gears, make minor adjustments, and repeat the process until you’re pleased with how smoothly your chain transitions across the gears.
Maintenance Tips
Nothing quite beats the thrill of a smooth bike ride. Achieving this pleasure requires not just a good quality bike, but also regular upkeep. One key aspect of maintenance you need to focus on is your bike chain.
Keeping your bike chain clean and lubricated
To ensure your bike performs at its best, you need to keep the chain spotless and well lubricated. Start by cleaning it with a good quality chain cleaner or degreaser. Use a chain cleaning tool to scrub off hardened dirt. Once the chain is clean, dry it with a soft cloth before applying lubricant. Spread the lube evenly across the chain links. Allow it to dry and then wipe off any excess to avoid attracting dirt.
Regularly inspecting and replacing your chain as needed
With time and usage, even the hardiest bike chain will wear out. To facilitate preemptive replacement, keep a close eye on your bike chain’s condition. Look out for signs of wear and tear, such as stiff chain links, rust, or a noisy chain while cycling. If these signs appear, or your chain is reaching the manufacturer’s recommended change interval, it’s time to consider replacing it.
Remember, proper maintenance of your bike chain not only ensures a smoother ride but also prolongs the life of other bike components.
Conclusion
If you’re a biking enthusiast, chances are, you’ll eventually need to shorten your bike chain. Don’t stress about it – this is a task you can handle right at home! It’s a simple procedure that doesn’t require any special skills but a little patience and the right tools.
Summary of the key steps in shortening a bike chain
Step 1: Begin by measuring your chain to find out if it actually needs shortening. This can be done by simply counting the links.
Step 2: Once that’s verified, use either a chain tool or quick link pliers to remove the chain from your bike.
Step 3: Now, determine how many links you need to remove to have the perfect chain length. Be careful, though; removing too many links can cause damage.
Step 4: When you have figured out the correct length, simply reattach the chain back onto your bike.
Final thoughts on maintaining your bike’s drivetrain
Remember, shortening your bike chain is just one aspect of maintaining your drivetrain. For the optimal cycling experience, regular check-ups and tune-ups for your bike are essential. Understanding your bike chain and how to maintain it is essential for smooth, efficient, and safe rides. So, keep learning and keep riding!