Last Updated on July 24, 2023 by Vinson Lozano
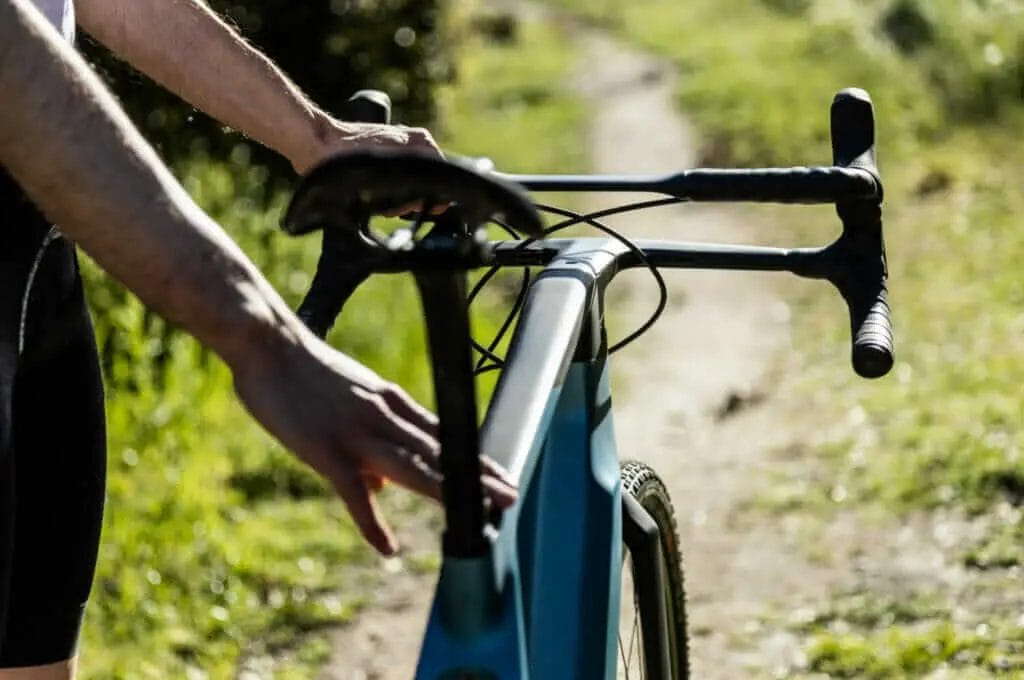
As a mountain biker, it’s essential to have the right tools on hand to keep your bike running smoothly and to tackle any unexpected repairs or adjustments on the trail. Whether you’re a beginner or a seasoned rider, having a well-stocked tool kit can save you time, money, and frustration.
In this article, we’ll highlight a range of essential mountain bike tools that every rider should have in their arsenal. From multi-tools and tire levers to chain breakers and torque wrenches, we’ll cover all the bases. So, grab a cup of coffee, get ready to take notes, and let’s dive into the world of must-have mountain bike tools!

Bike Multi-Tool
A bike multi-tool is an essential item for any mountain biker, as it provides a range of functions and can help you tackle common mechanical issues while out on the trail. Here are some key features to look for in a bike multi-tool:
Essential features of a bike multi-tool
- Hex keys: Hex keys, also known as Allen keys, are used for adjusting bolts on your bike, such as handlebars and saddle height. A good multi-tool should have a range of different sizes to accommodate various bolts on your bike.
- Screwdrivers: Look for a tool with both flathead and Philips screwdrivers. These can be useful for adjusting derailleur limits, brake levers, and other components that use screws.
- Torx keys: Torx keys are necessary for certain components, such as disc brake rotors and some bolts on modern bikes. It’s important to have a multi-tool that includes Torx keys of different sizes.
- Chain tool: A chain tool is crucial for fixing a broken chain while on the trail. Make sure the multi-tool you choose has a chain tool that is compatible with your specific type of chain.
- Spoke wrench: A spoke wrench is useful for adjusting the tension of your bike’s spokes. This can help with wheel truing and addressing any issues with wheel alignment.
Different types of bike multi-tools available
- Compact multi-tools: These are designed to be lightweight and portable, making them ideal for riders who prefer to travel light. They usually have a limited number of tools but are sufficient for basic repairs and adjustments.
- Modular multi-tools: These multi-tools feature a modular design, allowing you to add or remove different tools as needed. They offer more versatility and can accommodate a wider range of repairs.
- Folding multi-tools: Folding multi-tools have a compact design that folds out into a functioning set of tools. They are easy to store and can fit in your pocket or saddlebag.
- Shop quality multi-tools: These multi-tools are larger and heavier but offer a comprehensive set of tools for all types of repairs. They are favored by mechanics and riders who want to be fully prepared for any situation.
Having a reliable bike multi-tool can save you from being stranded on the trail and enable you to make basic repairs and adjustments to keep your bike running smoothly.
tire repair kit
A tire repair kit is an essential tool for any mountain biker, as it allows you to fix flat tires quickly and get back on the trail. Here are the components that make up a typical tire repair kit:
1. Tire Levers: These small plastic or metal levers help you remove the tire from the rim without damaging the tube. They are designed to hook under the tire bead and provide leverage to pop it off the rim.
2. Patch Kit: A patch kit contains patches and adhesive, which are used to repair small punctures in the tube. The patches are applied directly to the hole after it has been cleaned and roughened with sandpaper or a file.
3. Pump or CO2 Inflator: To inflate the repaired tube, you will need a pump or CO2 inflator. A pump is a more sustainable option, as it can be used multiple times. CO2 inflators provide quick inflation but require disposable CO2 cartridges.
4. Spare Tube: Carrying a spare tube is a good idea in case the puncture is too large to patch or if you encounter multiple flats. Simply swap out the damaged tube with the spare tube and patch the damaged one later.
5. Multi-Tool: A compact multi-tool is useful for making quick adjustments on the trail, such as tightening loose bolts, adjusting brakes, or adjusting the seat height.
Step-by-step guide for fixing a flat tire:
- Remove the wheel from the bike by loosening the quick-release or axle nuts.
- Use the tire levers to carefully remove one side of the tire from the rim. Be cautious not to pinch the tube.
- Locate the puncture by inflating the tube slightly and listening for the sound of escaping air or by submerging it in water to see bubbles.
- Roughen the area around the puncture with sandpaper or a file from the patch kit.
- Apply adhesive from the patch kit to the roughened area and let it dry for a few seconds.
- Place a patch over the puncture, pressing firmly to ensure good adhesion.
- Once the patch is secure, use the pump or CO2 inflator to inflate the tube.
- Carefully insert the tube back into the tire, making sure it is sitting evenly inside the tire.
- Use the tire levers to carefully and evenly pry the tire back onto the rim.
- Inflate the tire to the recommended pressure.
Having a tire repair kit and knowing how to use it can save you from being stranded on the trail with a flat tire. Make sure to check and replenish your kit regularly so that you are always prepared for any unexpected mishaps.
Pump
Types of bike pumps and their functionalities
When it comes to maintaining your mountain bike, a pump is an essential tool to have in your arsenal. Whether you’re on the trails or at home, a bike pump allows you to keep your tires properly inflated for a smooth and controlled ride. Here are the different types of bike pumps and their functionalities:
- Floor Pump: Also known as a track pump, a floor pump is the most common type of bike pump. It usually features a large barrel and a sturdy base for stability. Floor pumps are designed to quickly inflate your tires to the recommended pressure. They are suitable for both Presta and Schrader valves, and some models even come with built-in pressure gauges for precise inflation.
- Hand Pump: Hand pumps, also known as mini pumps or portable pumps, are compact and lightweight, making them perfect for on-the-go repairs or emergency situations. Hand pumps are typically small enough to fit in your backpack or attach to your bike frame. While they may take longer to inflate your tires compared to floor pumps, they are convenient when you’re out on the trails.
- CO2 Inflator: CO2 inflators use compressed carbon dioxide cartridges to quickly inflate your tires. They are incredibly lightweight and compact, making them a popular choice among racers and riders looking for fast and efficient inflation. CO2 inflators are best suited for emergency situations or when you need to quickly get back on the trail.
Proper tire inflation techniques
Proper tire inflation is crucial for a safe and enjoyable ride. Here are some tips for inflating your mountain bike tires:
- Check the recommended tire pressure: Every tire has a recommended pressure range printed on its sidewall. Make sure to inflate your tires within this range for optimal performance and traction.
- Use a pressure gauge: A pressure gauge, whether built-in or separate, allows you to accurately measure the pressure in your tires. This ensures that you don’t underinflate or overinflate them, preventing any potential damage or performance issues.
- Inflate in small bursts: When using a floor pump or hand pump, it’s best to inflate your tires in small bursts and regularly check the pressure. This allows you to fine-tune the pressure and prevent overinflation.
- Check for leaks and damage: Before inflating your tires, inspect them for any leaks or damage. A punctured or damaged tire may not hold air properly, leading to potential flats or compromised performance.
- Consider tubeless setups: Tubeless setups have gained popularity in mountain biking due to their lower risk of pinch flats and ability to run lower pressures. If you have a tubeless setup, make sure to follow the manufacturer’s instructions for proper tire inflation.
Having a reliable bike pump and knowing how to properly inflate your tires will not only improve your riding experience but also extend the lifespan of your tires. So, make sure to invest in a quality pump and take the time to check your tire pressure before hitting the trails
Chain Lubricant
Importance of chain lubrication
Keeping your mountain bike’s chain properly lubricated is crucial for optimal performance and longevity. Here are some reasons why chain lubrication is essential:
1. Reduced friction: A well-lubricated chain reduces friction between the chain and the drivetrain components, allowing for smooth and efficient pedaling.
2. Prevents rust and corrosion: Chain lubricant forms a protective layer on the chain, preventing rust and corrosion caused by exposure to moisture and other elements.
3. Extends chain life: Regular chain lubrication prevents excessive wear and tear on the chain, extending its lifespan and saving you money on replacement chains.
Choosing the right chain lubricant for your mountain bike
When it comes to choosing the right chain lubricant for your mountain bike, there are a few factors to consider:
1. Riding conditions: The type of riding you do and the conditions you encounter will influence the type of chain lubricant you need. Wet conditions may require a heavier, water-resistant lubricant, while dry conditions may require a lighter, dry lubricant.
2. Longevity: Some chain lubricants are designed to last longer between applications, providing extended protection and reducing the frequency of maintenance.
3. Environmentally friendly options: If you’re conscious about the environmental impact, there are eco-friendly chain lubricants available that are biodegradable and non-toxic.
4. Application method: Consider the ease of application and whether you prefer a drip bottle, aerosol spray, or wax-based lubricant.
It’s important to regularly clean your chain before applying lubricant to ensure optimal performance and effectiveness. Consult your mountain bike manufacturer’s recommendations and consider factors such as riding conditions and personal preferences when choosing the right chain lubricant for your bike.
Suspension Fork Pump
Why you need a suspension fork pump
A suspension fork pump is an essential tool for any mountain biker who wants to optimize their suspension performance. Here’s why you need one:
1. Proper Tuning: A suspension fork pump allows you to adjust the air pressure in your fork’s air spring. This helps you achieve the ideal balance between comfort and support, maximizing your bike’s performance on the trails.
2. Fine-Tuning: With a suspension fork pump, you can make small adjustments to the air pressure to fine-tune the behavior of your suspension fork. This can greatly improve your bike’s responsiveness and handling characteristics.
3. Maintenance: Regularly checking and adjusting the air pressure in your suspension fork is crucial for its longevity and performance. A suspension fork pump makes it easy to maintain the correct air pressure as recommended by the fork manufacturer.
How to properly adjust and maintain your suspension fork
Properly adjusting and maintaining your suspension fork is essential for a smooth and enjoyable ride. Here are some steps to follow:
1. Check the Recommended Air Pressure: Consult your suspension fork manufacturer’s guidelines to determine the recommended air pressure range for your weight and riding style.
2. Release Excess Air Pressure: If the current air pressure in your suspension fork is too high, use the suspension fork pump to release some air until it reaches the desired pressure.
3. Add Air Pressure: If the current air pressure is too low, use the suspension fork pump to add air until it reaches the desired pressure.
4. Test and Fine-Tune: Take your bike for a test ride and pay attention to how the suspension fork feels. If it feels too soft, increase the air pressure slightly. If it feels too harsh, decrease the air pressure slightly. Repeat this process until you find the ideal balance.
5. Regular Maintenance: Make it a habit to check and adjust the air pressure in your suspension fork regularly. This will ensure optimal performance and minimize the risk of damage or failure.
A suspension fork pump is a must-have tool for any mountain biker who wants to optimize their suspension performance. Invest in one and follow the proper adjustment and maintenance procedures to enjoy a smooth and controlled ride on the trails.
Hex Wrench Set
A hex wrench set is an essential tool for any mountain bike enthusiast. Also known as Allen keys, hex wrenches are used to tighten or loosen hexagonal bolts commonly found on bike components. Here are some types of hex wrenches and their uses:
Types of hex wrenches and their uses
1. 2mm: This small hex wrench is commonly used for adjusting brake calipers, handlebar stems, and some derailleur components.
2. 3mm: The 3mm hex wrench is often used for adjusting seat post clamps, some brake levers, and some derailleur components.
3. 4mm: The 4mm hex wrench is commonly used for adjusting crank arm bolts, some brake levers, and some derailleur components.
4. 5mm: The 5mm hex wrench is one of the most commonly used sizes. It is used for adjusting pedal bolts, some brake calipers, and some derailleur components.
5. 6mm: The 6mm hex wrench is commonly used for adjusting stem bolts, some pedal bolts, and some crankset bolts.
Common bike components that require hex wrenches
There are several bike components that require the use of hex wrenches for adjustments or maintenance. Some common components include:
- Brake calipers
- Brake levers
- Handlebar stems
- Seat post clamps
- Derailleurs
- Crank arms
- Pedals
Having a good quality hex wrench set is crucial for making quick adjustments and repairs on the trail. Make sure to invest in a set that includes a wide range of sizes and has a comfortable grip for easy handling.
Chain Breaker
A chain breaker is an essential tool for any mountain biker’s toolkit. It is used to repair a broken chain, which can happen during a ride. Here’s how to use a chain breaker to fix a broken chain:
- Start by finding the broken link in the chain. It will be easily identifiable as it will have a missing pin or a visibly damaged link.
- Place the chain breaker tool onto the chain, positioning the pin directly under the broken link.
- Turn the handle of the chain breaker clockwise to push the pin into the chain. Keep turning until the pin comes out of the other side of the link. Be careful not to push the pin all the way out.
- Separate the broken link from the rest of the chain.
- To reconnect the chain, align the ends of the chain and reinsert the pin halfway through the link using the chain breaker tool.
- Using a pair of pliers, carefully push the pin the rest of the way into the link until it is flushed with the chain.
- Give the chain a gentle tug to make sure the link is securely connected.
In addition to repairing a broken chain, it is important to properly maintain your chain to ensure smooth and efficient shifting. Here are some tips for maintaining your chain:
- Clean your chain regularly with a degreaser and a brush to remove dirt and grime.
- Lubricate your chain after cleaning to reduce friction and prevent rust.
- Check your chain for wear regularly using a chain wear indicator tool. If the wear exceeds the recommended limit, it is time to replace the chain.
- Avoid cross-chaining, which means using extreme gear combinations that put excessive stress on the chain.
By having a chain breaker in your toolkit and following these maintenance tips, you can keep your mountain bike chain in optimal condition and enjoy smooth and trouble-free rides.
Torque Wrench
Why a torque wrench is necessary for bike maintenance
A torque wrench is an essential tool for every mountain bike enthusiast. It allows you to tighten bolts and screws to the precise level of torque required for optimal performance and safety. Here are a few reasons why a torque wrench is necessary for bike maintenance:
1. Prevent Over-Tightening: Over-tightening bolts can damage bike components, such as handlebars, stems, and seat posts. Using a torque wrench ensures that you tighten to the manufacturer’s recommended level, preventing damage and prolonging the life of your bike.
2. Avoid Under-Tightening: Under-tightening bolts can lead to parts coming loose during rides, which can be dangerous. A torque wrench helps you apply the correct amount of force, ensuring that bolts are securely tightened without risking breakage or slippage.
3. Maintain Component Integrity: Different bike components require different torque settings. Using a torque wrench allows you to maintain the integrity of each component by tightening to the appropriate level. This is especially important for carbon fiber components that can be easily damaged by excessive force.
Proper torque settings for different bike components
It’s crucial to understand the proper torque settings for different bike components to avoid damaging your bike. Here are a few examples of torque settings for common bike parts:
• Handlebars: Torque the stem bolts to 5-7 Newton meters (Nm) and the faceplate bolts to 4-6 Nm.
• Seatpost: Tighten your seatpost clamp to approximately 6-8 Nm, but be sure to check your specific seatpost manufacturer’s recommendations.
• Crankset: Torque the crankset bolts to 30-40 Nm to ensure a secure and stable connection.
• Pedals: Pedal axle nuts should be tightened to 30-35 Nm to ensure a firm grip on the crank arm.
• Brake Calipers: Tighten the brake caliper mounting bolts to around 8-10 Nm to ensure proper alignment and braking performance.
Remember, these are just general torque settings, and it’s important to refer to your bike’s manual or the manufacturer’s recommendations for specific torque values.
Using a torque wrench as part of your bike maintenance routine is essential for preserving the longevity and performance of your mountain bike. It gives you the confidence of knowing that your bike is properly maintained and free from potential hazards that can arise from incorrectly tightened components.
Bike Stand
Benefits of using a bike stand for repairs and maintenance
When it comes to maintaining and repairing your mountain bike, having a bike stand is essential. Here are some of the benefits of using a bike stand for your bike maintenance:
- Stability: A bike stand provides a stable platform for working on your bike. It holds the bike securely in place, allowing you to perform repairs and maintenance tasks without the fear of the bike falling over.
- Ease of Access: By lifting your bike off the ground with a bike stand, you have easy access to all parts of the bike. This makes it much easier to clean, inspect, and repair various components without straining your back or constantly bending down.
- Convenience: With a bike stand, you don’t have to depend on someone else or find a makeshift solution to hold your bike while you work on it. A bike stand allows you to work independently and efficiently.
- Adjustability: Many bike stands offer adjustable height and angle options, allowing you to position your bike at the most comfortable working height. This helps you maintain good ergonomics and reduces strain on your body.
- Portability: There are various types of bike stands available, ranging from sturdy floor stands to portable folding stands. Portable stands are lightweight and compact, making them easy to transport to different locations, whether it’s your garage, a trailhead, or a bike park.
Investing in a quality bike stand is a smart decision for any mountain bike enthusiast. It not only makes your bike maintenance tasks more manageable but also helps prolong the lifespan of your bike by ensuring proper care and attention.
Spoke Wrench
A spoke wrench is a must-have tool for any mountain biker who wants to maintain and repair their bike. This simple yet effective tool is used to adjust the tension of the spokes in your bike’s wheels, ensuring they are properly aligned and true.
How to use a spoke wrench to true a wheel
Trueing a wheel refers to the process of adjusting the tension of the spokes to ensure the wheel spins straight and without wobbles. Here’s a step-by-step guide on how to use a spoke wrench to true a wheel:
- Start by flipping your bike upside down or placing it in a bike stand to elevate the wheel you want to true. This will make it easier to access the spokes.
- Locate any of the spokes that appear visually loose or have a wobble in the wheel.
- Insert the appropriate size of the spoke wrench into the spoke nipple, which is the small nut that connects the spoke to the rim.
- Gently turn the spoke wrench counterclockwise to tighten the spoke and bring the wobbly section of the rim closer to the desired position. Remember to make small adjustments and frequently check the trueness of the wheel.
- If the rim is too far to one side, you can tighten the corresponding spokes on the opposite side of the wheel to bring it back into alignment.
- Continue adjusting the spokes until the wheel is properly trued, spinning straight without any noticeable wobbles.
It’s important to note that truing a wheel can be a delicate process, and it may take some practice to achieve the desired results. If you are unsure, it’s always recommended to consult a professional bike mechanic to avoid causing further damage to your wheel.
Having a spoke wrench in your toolkit will ensure you can make these adjustments whenever needed, keeping your wheels in optimal condition for your mountain biking adventures.
Remember, proper maintenance and regular inspections of your bike’s wheels will help prolong their lifespan and keep you safe on the trails.
Conclusion
Essential mountain bike tools to have in your toolkit
Having the right tools for your mountain bike is essential for maintaining and repairing your bike. Here are some must-have tools that every mountain biker should have in their toolkit:
- Multi-tool: A multi-tool is a versatile tool that combines multiple functions into one. It typically includes Allen keys, screwdrivers, and a chain breaker, making it a convenient tool for on-trail repairs and adjustments.
- Tire levers: Tire levers are essential for removing and installing tires. They make the process much easier and prevent damage to the tire or rim.
- Pump: A portable bike pump is essential for maintaining proper tire pressure. Whether you prefer a hand pump or a CO2 inflator, having a reliable pump will ensure that you’re always ready to hit the trails.
- Chain lube: Keeping your chain properly lubricated is crucial for smooth shifting and efficient pedaling. Choose a high-quality chain lube and regularly apply it to prolong the life of your chain.
- Hex wrenches: Hex wrenches, also known as Allen keys, are used to adjust various components on your bike, such as handlebars, stem, and seat post. A set of hex wrenches in different sizes is a must-have for any bike toolkit.
Tips for maintaining and caring for your tools
To ensure that your tools last for a long time and remain in good working condition, here are some tips for maintaining and caring for them:
- Clean and dry: After every ride, make sure to clean your tools and remove any dirt or debris. Dry them thoroughly to prevent rust and corrosion.
- Store in a dry place: Store your tools in a dry and climate-controlled environment to prevent moisture damage.
- Check for wear and damage: Regularly inspect your tools for any signs of wear or damage. Replace any worn-out or damaged tools to ensure safe and effective use.
- Keep them organized: Invest in a tool roll or toolbox to keep your tools organized and easily accessible. This will also help prevent loss or misplacement.
By investing in quality tools and properly maintaining them, you can ensure that you have the necessary equipment for any on-trail repairs or maintenance tasks. Taking care of your tools will not only extend their lifespan but also contribute to a safer and more enjoyable mountain biking experience.