Last Updated on February 22, 2024 by Vinson Lozano
Identifying the signs of a snapped rear derailleur gear cable
Identifying a snapped rear derailleur gear cable is essential in diagnosing the issue and proceeding with the necessary repairs. Here are some signs to look out for:
- Difficulty shifting gears: If you find it challenging to shift gears smoothly or experience gears that are not engaging properly, it may indicate a broken cable.
- Limited or no movement in the derailleur: A snapped cable will result in limited or no movement in the rear derailleur. When you shift gears, you may notice that the derailleur does not respond or moves inconsistently.
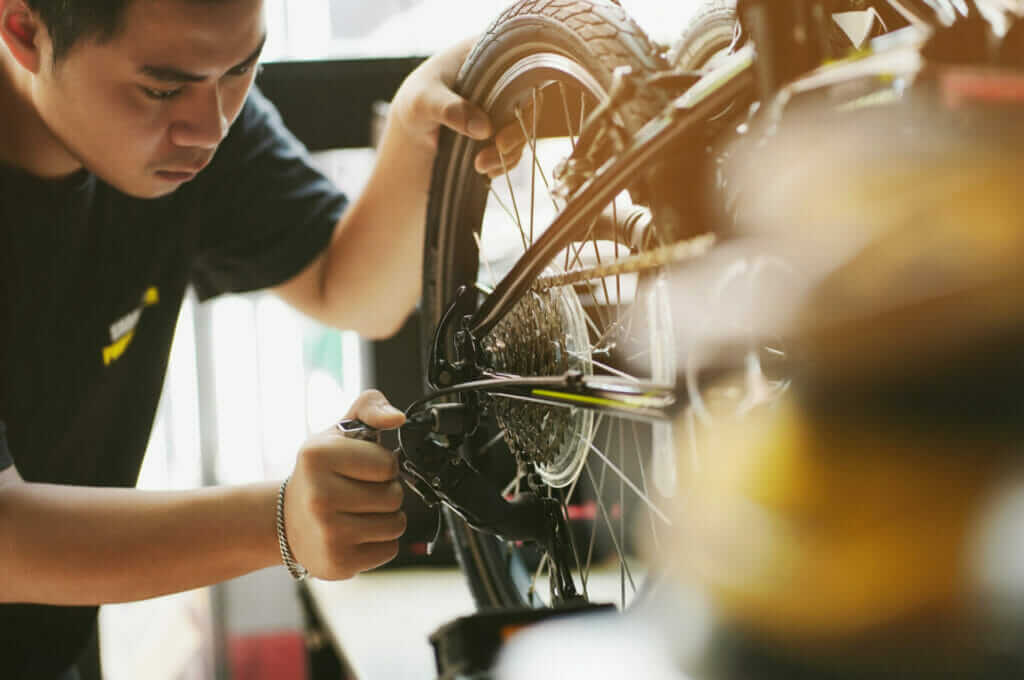
- Visual inspection: Take a close look at the rear derailleur and examine the cable. Look for any visible signs of damage, such as fraying or a completely snapped cable.
By identifying these signs, you can confirm if a snapped rear derailleur gear cable is the root cause of your bike’s shifting issues and proceed with the necessary repairs.
Steps to diagnose a broken rear derailleur gear cable
- Inspect the cable visually: Look closely at the rear derailleur and examine the gear cable. Check for any signs of damage, such as fraying or a completely snapped cable.
- Test shifting gears: Try shifting through the different gears while riding your bike. Pay attention to any difficulty or inconsistency in the shifting process. If you experience gears that are not engaging properly or have trouble shifting smoothly, it could indicate a broken cable.
- Check for limited or no movement in the derailleur: Shift gears and observe the movement of the rear derailleur. If the derailleur does not respond or moves inconsistently, it is likely that the cable has snapped.
- Confirm by manually moving the derailleur: If you suspect a broken cable, you can manually move the rear derailleur while the bike is stationary. Gently push or pull on the derailleur to see if it moves freely. If there is little to no movement, it is a strong indication of a snapped gear cable.
- Seek professional advice: If you are unsure about diagnosing the issue yourself or require confirmation, it is recommended to consult a professional bike mechanic who can assess and diagnose the problem accurately.
Tools Needed for Repairing a Snapped Rear Derailleur Gear Cable

When it comes to repairing a snapped rear derailleur gear cable, having the right tools can make the process much smoother. Here are the essential tools you will need for this repair:
- Cable cutters: These will help you trim the new gear cable to the correct length.
- Allen key set: You’ll need this to remove the rear derailleur from the bike.
- Needle-nose pliers: These will come in handy for holding and threading the gear cable.
- Cable end caps: These small metal caps will prevent the cable from fraying.
- Cable housing cutter or sharp knife: This will be used to cut the cable housing to the correct length.
- Screwdriver: You may need this to adjust the tension of the rear derailleur if necessary.
These tools will provide you with everything you need to successfully replace a snapped rear derailleur gear cable.
Essential tools for fixing a snapped rear derailleur gear cable
To successfully fix a snapped rear derailleur gear cable, you will need a few essential tools. These tools will help you safely remove the broken cable and install a new one. Here are the tools you’ll need:
- Cable cutters: These specially designed cutters will allow you to cleanly trim the new gear cable to the correct length.
- Allen key set: An Allen key set is necessary to remove the rear derailleur from the bike frame.
- Needle-nose pliers: These pliers will come in handy for holding and threading the gear cable through the derailleur.
- Cable end caps: Small metal caps that prevent the cable from fraying at the ends.
- Cable housing cutter or sharp knife: You’ll need this tool to cut the cable housing to the correct length.
- Screwdriver: While not always necessary, a screwdriver may be needed to make adjustments to the tension of the rear derailleur.
Having these essential tools on hand will ensure a smooth and successful repair of your snapped rear derailleur gear cable.
Optional tools for more advanced repair techniques
While the essential tools mentioned earlier are sufficient for most rear derailleur gear cable repairs, there are a few optional tools that can be useful for more advanced repair techniques. These tools may not be necessary for everyone, but if you’re comfortable with more complex repairs, they can make the job easier. Here are some optional tools you might consider having:
- Cable puller: This tool helps to create tension on the cable, making it easier to thread through the derailleur and housing.
- Chain whip: In some cases, you may need to remove the rear cassette to access the derailleur cable. A chain whip holds the cassette in place while you unscrew it.
- Crank puller: If you need to remove the crankset to access the rear derailleur, a crank puller is essential. It allows you to safely remove the cranks without damaging the bike.
- Fourth-hand tool: This specialized tool helps to hold the cable tight while you make fine adjustments to the derailleur.
These optional tools can be handy for experienced cyclists or those who want to tackle more advanced repair tasks. However, for the average cyclist, the essential tools will be sufficient to fix a snapped rear derailleur gear cable.
Replacing a Snapped Rear Derailleur Gear Cable
Replacing a snapped rear derailleur gear cable is a straightforward process that can be done with a few simple steps:
- Start by shifting the chain onto the smallest chainring and the smallest rear cog. This relieves tension on the cable, making it easier to remove.
- Locate the cable fixing bolt on the rear derailleur. Loosen the bolt with an Allen wrench and remove the old cable from the derailleur.
- Next, move to the shifters and detach the cable from the shifter mechanism. This can usually be done by loosening a screw or using a release mechanism.
- Once the old cable is removed, insert the new cable into the shifter mechanism and thread it through the cable housing.
- After threading the cable through the housing, attach it to the rear derailleur. Make sure it is secured properly and tighten the cable fixing bolt.
- Finally, check the tension of the new cable by shifting through the gears. Make any necessary adjustments to ensure smooth shifting.
By following these steps, you can easily replace a snapped rear derailleur gear cable and get your bike back in working order.
Step-by-step guide to removing the broken cable
To begin removing the broken cable, shift the chain onto the smallest chainring and the smallest rear cog. This relieves tension on the cable, making it easier to remove.
Locate the cable fixing bolt on the rear derailleur and loosen it with an Allen wrench. Remove the old cable from the derailleur.
Next, move to the shifters and detach the cable from the shifter mechanism. This can usually be done by loosening a screw or using a release mechanism.
Once the old cable is removed, insert the new cable into the shifter mechanism and thread it through the cable housing.
After threading the cable through the housing, attach it to the rear derailleur. Ensure it is securely fastened and tighten the cable fixing bolt.
Finally, check the tension of the new cable by shifting through the gears. Make any necessary adjustments to ensure smooth shifting.
Following these steps will allow you to properly remove the broken cable and proceed with replacing it.
Installation process of a new rear derailleur gear cable
To install a new rear derailleur gear cable, start by threading the cable through the shifter mechanism, ensuring it is properly aligned and seated. Use a cable cutter to trim the excess length, leaving about 3-4 inches to work with.
Next, insert the cable into the cable housing, making sure it is fully seated and threaded properly. Pull the cable tight, ensuring there is no slack.
Moving to the rear derailleur, locate the cable fixing bolt and loosen it with an Allen wrench. Insert the cable into the bolt and tighten it securely.
Once the cable is attached to the rear derailleur, check for proper tension by shifting through the gears. Make any necessary adjustments using the barrel adjuster.
Finally, double-check that the cable is securely fastened at both ends and ensure smooth shifting before completing the installation.
Remember to always follow the manufacturer’s instructions and consult a professional if needed.
Adjusting the Rear Derailleur after Cable Replacement
Now that you’ve replaced your snapped rear derailleur gear cable, it’s essential to adjust the rear derailleur for smooth gear shifting. Follow these steps to fine-tune your rear derailleur:
- Start by shifting to the smallest cog on your rear cassette and the smallest chainring on your front chainset.
- Locate the barrel adjuster on your rear derailleur and turn it clockwise to increase tension or counterclockwise to decrease tension.
- Shift through the gears and look for any skipping or difficulty in shifting. If necessary, make small adjustments to the barrel adjuster until the shifting is smooth.
- Check the alignment of the jockey wheel with the smallest cog. If it is not aligned, use a screwdriver to adjust the high and low limit screws.
- Repeat the shifting and adjusting process for the other gears, ensuring smooth and precise shifting throughout.
Remember to keep the chain properly lubricated and regularly check the cable tension to maintain optimal performance.
Fine-tuning the rear derailleur for smooth gear shifting
Once you’ve replaced the snapped rear derailleur gear cable, it’s crucial to fine-tune the rear derailleur for smooth gear shifting. Start by shifting to the smallest cog on your rear cassette and the smallest chainring on your front chainset. Locate the barrel adjuster on your rear derailleur and turn it clockwise to increase tension or counterclockwise to decrease tension. Shift through the gears and pay attention to any skipping or difficulty in shifting. Make small adjustments to the barrel adjuster until the shifting is smooth and precise.
It’s also important to check the alignment of the jockey wheel with the smallest cog. If it’s not aligned, use a screwdriver to adjust the high and low limit screws. Repeat the shifting and adjusting process for the other gears, ensuring smooth and precise shifting throughout. Remember to keep the chain properly lubricated and regularly check the cable tension to maintain optimal performance.
Tips for ensuring proper cable tension and alignment
- After replacing the snapped rear derailleur gear cable, it’s important to ensure proper cable tension and alignment for optimal performance.
- Start by shifting to the smallest cog on your rear cassette and the smallest chainring on your front chainset.
- Check the alignment of the jockey wheel with the smallest cog. If it’s not aligned, use a screwdriver to adjust the high and low limit screws.
- Pay attention to any skipping or difficulty in shifting. Make small adjustments to the barrel adjuster on the rear derailleur to fine-tune the tension. Clockwise increases tension, while counterclockwise decreases tension.
- Shift through the gears and repeat the adjusting process, making sure the shifting is smooth and precise.
- Regularly check the cable tension and alignment, and keep the chain properly lubricated for optimal gear shifting performance.
Common Mistakes to Avoid When Dealing with a Snapped Rear Derailleur Gear Cable
When dealing with a snapped rear derailleur gear cable, there are a few common mistakes you should avoid to prevent further issues. Here are some things to keep in mind:
- Not checking for other damage: When the cable snaps, it’s crucial to inspect the derailleur, hanger, and shifters for any signs of damage. Ignoring these potential issues can lead to future mechanical problems.
- Rushing through the cable replacement: Take your time to carefully remove the broken cable and install the new one. Rushing this process can result in improper installation or alignment, causing poor shifting performance.
- Neglecting to adjust the barrel adjuster: After installing the new cable, make sure to fine-tune the tension using the barrel adjuster. Ignoring this step can result in skipping gears or difficulty shifting.
Avoiding these common mistakes will ensure a successful repair and optimal gear shifting performance.
Avoiding pitfalls that may worsen the issue
When dealing with a snapped rear derailleur gear cable, it’s important to avoid certain pitfalls that could worsen the issue. Here are some key tips to keep in mind:
- Don’t ignore other potential damage: Take the time to thoroughly inspect your derailleur, hanger, and shifters for any signs of damage. Ignoring these issues can lead to further mechanical problems down the line.
- Avoid rushing through the cable replacement process: Take your time to carefully remove the broken cable and install the new one. Rushing this process can result in improper installation or alignment, leading to poor shifting performance.
- Don’t neglect the barrel adjuster: After installing the new cable, make sure to fine-tune the tension using the barrel adjuster. Neglecting this step can result in skipping gears or difficulties in shifting.
By avoiding these pitfalls, you can ensure a successful repair and optimal gear shifting performance.
Troubleshooting tips for any challenges during repair
If you encounter any challenges during the repair process of a snapped rear derailleur gear cable, here are some troubleshooting tips to help you overcome them:
- Difficulty removing the broken cable: Use lubricant or penetrating oil to loosen any rust or debris that may be causing resistance. Gently wiggle the cable back and forth while applying pressure to ease it out of the derailleur.
- Cable alignment issues: If the new cable doesn’t easily slide into the derailleur, check for any obstructions or misalignment. Ensure that the cable housing is properly seated and aligned with the cable entry point on the derailleur.
- Shifting problems: If you experience skipping gears or difficulty shifting after installing the new cable, check the tension and alignment of the cable. Adjust the barrel adjuster to fine-tune the shifting performance.
Remember, patience and attention to detail are key when troubleshooting any challenges that may arise during the repair process.
Final Checks and Maintenance Tips
Once you have replaced the rear derailleur gear cable, it is important to perform some final checks and follow maintenance tips to ensure optimal performance. Here are some steps you can take:
- Test the replaced cable: Shift through all the gears to ensure smooth and accurate shifting. Pay attention to any skipping or hesitation, which may indicate that further adjustments are needed.
- Check cable tension: Use the barrel adjuster to fine-tune the tension if necessary. The derailleur should shift smoothly without excessive effort.
- Lubricate the cable: Apply a few drops of lubricant to the cable where it enters the housing. This will help reduce friction and improve shifting performance.
- Regular maintenance: Periodically inspect the gear cable for signs of wear or damage. Replace it if needed to prevent future snapping.
By following these final checks and maintenance tips, you can maximize the lifespan and performance of your rear derailleur gear cable.
Testing the replaced rear derailleur gear cable
Once you have replaced the rear derailleur gear cable, it is essential to test its functionality. This step is crucial to ensure that the new cable is installed correctly and that the gear shifting is smooth and accurate. Start by shifting through all the gears to see if there are any skips or hesitations. Ensure that the chain moves easily between each cog without any excessive effort. Pay attention to the shifting precision and how smoothly the chain moves. If you notice any issues, such as hesitation or skipping, further adjustments may be necessary. By thoroughly testing the replaced rear derailleur gear cable, you can ensure optimal performance and a positive riding experience.
Maintenance tips to prevent future cable snapping
To avoid the inconvenience of a snapped rear derailleur gear cable in the future, there are several maintenance tips you can follow:
- Regularly clean and lubricate the derailleur system to prevent dirt and debris buildup that could cause the cable to bind or snap.
- Inspect the cable for any signs of fraying or corrosion, and replace it if necessary.
- Check the cable tension and alignment regularly to ensure it is properly adjusted.
- Avoid excessive force when shifting gears, as this can put unnecessary strain on the cable.
- Periodically inspect the housing and cable routing for any damage or wear, and replace as needed.
- Store your bicycle in a dry place to prevent rust and corrosion.
By implementing these maintenance tips, you can prolong the lifespan of your rear derailleur gear cable and minimize the risk of future snapping.
