Last Updated on September 6, 2023 by Vinson Lozano
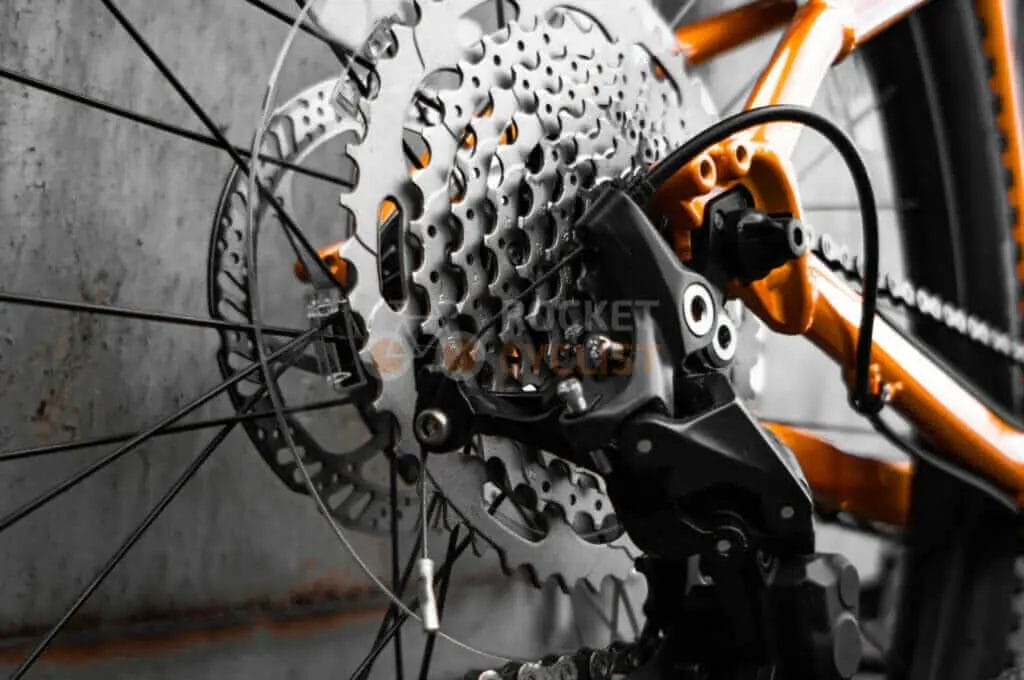
Have you ever noticed a plastic disc sitting between your bike’s cassette and rear wheel and wondered what it is and whether you can remove it, well, you’re not alone.
This disc is what we call a dork disc or spoke protector, and today, we’ll discuss how to remove it and why.
What is a Dork Disc and Why Remove it?
First off, a “dork disc” is a plastic guard found on the rear wheel of most bicycles. It was designed to prevent the chain from jumping off the top gear and damaging the spokes. Sounds pretty essential, right?
However, many experienced cyclists choose to remove them for aesthetic reasons or sometimes due to rattling noise it can make while biking. But remember, if your bicycle’s rear derailleur is not properly adjusted, the dork disc serves an essential role, preventing expensive damages.
Benefits of Removing a Dork Disc
So, why should you potentially think about getting rid of this seemingly helpful component? Here are a couple of reasons:
Improved aesthetics: Many cycling buffs believe that removing the dork disc results in a cleaner, more professional look.
Reduced noise: If not fitted properly, a dork disc can make rattling noises, particularly at higher speeds. By removing it, you’d get a quieter ride.
Remember, despite the benefits mentioned, the removal of a dork disc is entirely subjective. If however, you have decided to proceed, ensure your bike’s gear mechanism is appropriately adjusted to avoid any potential issues. Happy cycling!
Tools and Materials Needed
In order to remove the dork disc, also known as the spoke protector, from your bicycle, you will need certain tools and materials. This plastic disc, though serving a crucial safety function, is often considered unsightly among many biking enthusiasts, which leads to its unconventional name. So, let’s roll up our sleeves and get to work, but first, compile the necessary tools and materials.
List of Tools Required
1. A set of Allen wrenches: These will be utilized to loosen the bolts on your rear wheel, allowing you to remove it from the bike frame.
2. Chain whip: A chain whip is essential for holding the cassette in place while you remove the lock ring.
3. Lock ring remover: This unique tool interacts with the grooves on your cassette’s lock ring, allowing you to unscrew it and access the dork disc.
Recommended Materials
1. Lubricant: A small application of lubricant can make the entire removal process sleek and straightforward.
2. Clean Cloth: To wipe off any excess grease or dirt that could interfere with the process.
With these tools and materials at your disposal, you’re ready to get started on removing your bike’s dork disc. Always remember, while the dork disc may not have the best reputation for looks, it does serve a safety purpose. It’s designed to prevent your chain from overshooting the smallest cog on your cassette and potentially damaging your spokes. So, consider keeping it, especially if you’re not a professional biker!
Preparation
Before we jump right into the process, there are a couple of things we need to take care of. Removing a bicycle wheel’s dork disc is not difficult, but it does require some preparation. You want to ensure that the task is done correctly and safely.
Safety Measures
Safety first: Here’s a list of safety measures that need to be taken:
- Work Gloves: Safety should be your top priority. Wearing thick work gloves will protect your hands from cuts and scrapes that might occur while removing the dork disc.
- Eye Protection: Tiny fragments and dust can be harmful to your eyes. It’s highly recommended to wear safety goggles for protection.
- Proper Lighting: It’s essential to work in a well-lit area to ensure that you can clearly see the bike wheel and the dork disc that you are trying to remove.
Bike Cleaning Before Removal
Cleaning first: This is another crucial step before removing the dork disc. Cleaning your bike wheel ensures that you have a clear view of the dork disc and you’re not working in a dirty environment. You can do this by simply using soapy water and a sponge or cloth.
To sum it up, the preparation before removing a dork disc involves focusing on safety and cleanliness. Adhering to these steps will help to ensure a smooth and successful disc removal process.
Remember that safety should always be your first priority. Only proceed to the next step, once you’re sure that you’re fully prepared and safe.
Steps to Remove a Dork Disc
Nothing spoils the clean lines of a geared bike like a dork disc – the round plastic disc found sitting between the cassette and the spokes on the rear wheel. It’s affectionately nicknamed based on its common association with new and inexperienced riders, or “dorks”.
However, these discs can be redundant for more seasoned bikers. If you’re wondering how to remove a dork disc without damaging any components of the bike, here is a simple, step by step guide to help you.
Step 1: Lift the Chain Up
Firstly, you need to disconnect the chain from the rear cassette. It might be tempting to remove the disc without doing this, but it’s much easier – and safer – to do so. Using a chain tool, gently push the pins to disconnect the chain and lift it off from the dork disc.
Step 2: Unscrew the Dork Disc
Next, use a Phillips screwdriver to unscrew the small screws securing the dork disc to the rear wheel hub. If your bike uses a clip-on style derailleur, you will have to unclamp it from the disc before you can continue.
Step 3: Remove the Dork Disc
Lastly, slide the dork disc off the hub. Be careful not to damage the spokes or any other parts of the wheel. If the disc does not slide off easily, do not force it. Instead, use a blunt knife or a flat screwdriver to gently pry it off.
And there you go – a guide to removing a dork disc. Just follow these steps, and your bike will look cleaner, sleeker, and ‘dork’-free.
Cleaning and Adjustments
When it comes to maintaining your bike, one task that often gets overlooked is the removal of the “dork disc.” Officially known as a spoke protector or derailleur guard, this plastic disc found between the cassette and rear wheel is thought to prevent the chain from going into the wheel spokes in cases of an overshift. However, many avid riders believe it to be unnecessary and opt to remove it for aesthetic reasons.
Cleaning the Wheel and Cassette
Step 1: Before we get down to removing the “dork disc”, it’s vital first to clean the wheel and cassette. Using a soft cloth and a gentle cleaning solution, wipe the grime off the wheel and cassette — paying close attention to the spokes and gear teeth. This will ensure we’re working with a clean surface.
Step 2: Next, we’ll remove the rear wheel from the bike. Release the bike’s quick-release lever and carefully remove the wheel from the dropout slots.
Step 3: To get to the “dork disc”, we’ll need to remove the cassette. This can be done using a cassette removing tool and a chain whip. The chain whip holds the cassette in place while the tool unscrews the lockring.
Step 4: Once the cassette is off, you can easily slip off the “dork disc.” Some may require a bit of a nudge or twist to slide over the spokes, but be careful not to damage them.
Step 5: With the “dork disc” removed, you’ll need to clean the area behind where it sat. Wipe it clean of any dirt or grime, then reassemble the cassette and fasten it securely with the lockring.
Step 6: Finally, once everything is clean and shiny again, reattach the rear wheel to the bike, and you’re all set!
And just like that, taking off the dork disc is no big deal. Keeping your bike clean and well adjusted not only improves its performance but also extends its lifespan. Safe cycling!
Benefits of Removing a Dork Disc
You might have found yourself wondering about that plastic ring nestled between your bicycle’s cassette and the spokes – what it is, what it does, or whether or not it’s necessary. That piece, my friend, is called a Dork Disc, and despite its seemingly insignificant existence, it actually serves an essential purpose.
However, whether you should keep it or remove it depends on your cycling needs and skills. This simple guide will give you the benefits of removing your Dork Disc, but remember always to ensure the proper functioning of your bike.
Improved Aesthetics
Enhancing your Bike’s Look: One of the principal reasons cyclists remove the Dork Disc is to improve aesthetics. It’s often regarded as a mark of amateurishness in the cycling community, and its absence often gives your bike a cleaner and edgier look.
Plus, with it gone, the mechanism of your rear cassette and derailleur will be in full sight, which might appeal to lovers of machinery and mechanisms.
Reduced Weight and Increased Speed
Enhancing Performance: This is a minor point, but it still holds weight – literally. Although the dork disc is frictionless and makes no contact with either chain or spokes under normal working conditions, it adds to the overall weight of your bike, affecting your speed and balance. By removing it, the weight reduction could enhance your bike’s acceleration slightly.
To wrap it up, both choices have their pros and cons, and your decision should depend on your personal preferences, technical skill, and cycling needs. Always ensure your bike’s derailleur is properly adjusted to avoid issues.
Common Mistakes to Avoid
When it comes to removing the dork disc from your bike, there are several common mistakes you should avoid to prevent damage or ineffective repair. The dork disc, often referred to as a spoke protector, can be an eyesore to some cyclists, but removing it requires caution and understanding of its part in your bike’s mechanism.
Avoiding Damage to the Bike
Damage to the Spokes: The primary pitfall in removing the dork disc is unintentionally damaging the spokes of the bike. From a beginner’s point of view, it might seem easier to break the disc away rather than unscrewing and removing it properly, but reckless handling could lead to spoke injuries. Note that damaging a single spoke can affect your bike’s wheel stability and balance.
Damage to the Hub: Another area at risk during dork disc removal is the hub. When removing the disc, be sure not to disturb or damage the hub. Steering clear of these two fundamental mistakes in the process will help preserve your bike’s condition and performance.
Properly Reinstalling the Chain
Another crucial aspect to pay attention to when removing the dork disc is reinstalling your chain. Skipping this could lead to chain derailment. Here are the steps:
- Carefully remove the chain from the bike.
- Proceed to safely remove the dork disc.
- Once done, ensure to reinstall the chain back correctly.
Bottom line, while removing the dork disc might seem like a quick DIY task, it calls for gentle handling. By avoiding these common mistakes, you can maintain the longevity and efficiency of your bike.
Conclusion
The process of removing a dork disc is simple and straightforward, but it does demand your attention to ensure safety of your precious bike. If done right, it can even save your derailleur from unnecessary damage.
Summary of Steps to Remove a Dork Disc
Here’s a quick summary of the steps we’ve taken:
- Firstly, we carefully removed the bike’s rear wheel.
- Then we carefully dislodged the cassette by using a lockring tool.
- Next, we removed the dork disc simply by pulling it out.
- After removal, we reattached the cassette back on the hub of the wheel.
- Finally, we reinstalled the rear wheel back onto the bike.
Final Thoughts on Removing a Dork Disc
Is removing a dork disc a good practice? It depends on your competence and confidence as a cyclist. If you’re a seasoned biker with full control over your gears and have no worries about chain misalignment, go ahead, beautify your bike by removing that harmless-but-perceived-as-unsightly dork disc. But for novice cyclists, might be better to leave it intact.
That little plastic disc is there for a reason – to protect spokes from being damaged by the derailleur or the chain!
Let’s recap the pros and cons:
Pros of removing the dork disc:
- Gives your bike a cleaner, professional look.
- Potential weight reduction – albeit very slight!
Cons of removing the dork disc:
- No protection if the chain drops off the largest rear sprocket.
- Risk of spoke damage if derailleur malfunctions.
In the end, it’s about how confident you are with your biking skills and how willing you are to take precautions to maintain your bike’s gears. Remember, safety should always come first before aesthetics!