Last Updated on September 12, 2023 by Vinson Lozano
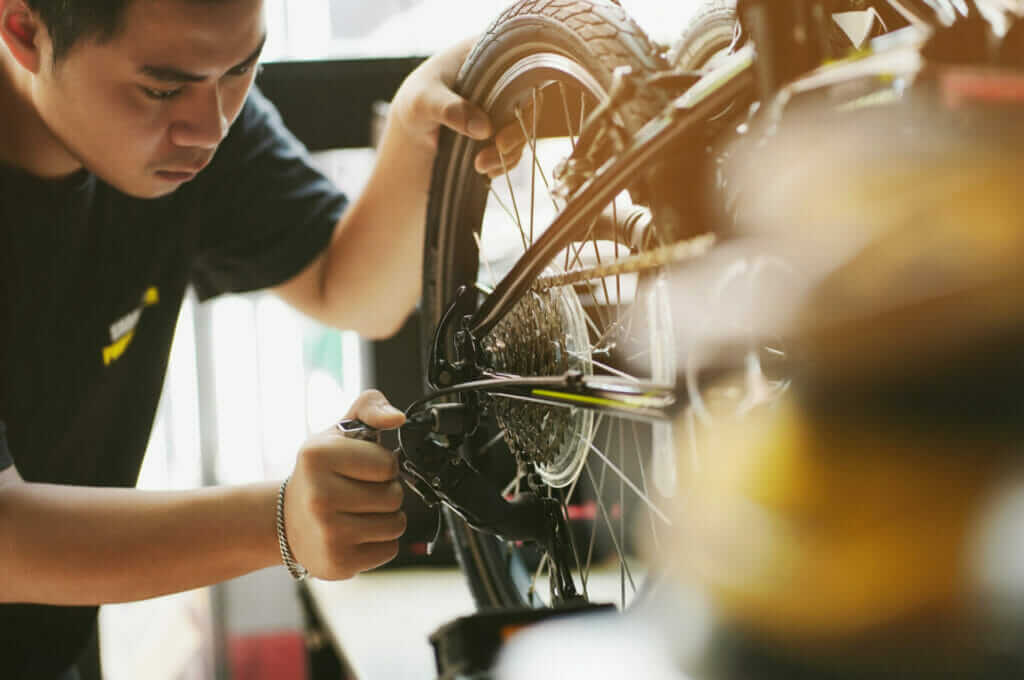
Got a flat bike tire? Don’t sweat it! It’s a common problem among cycling enthusiasts and commuters alike. Patching a bike tire is a trusted solution that can get you rolling in no time!
Why Patching a Bike Tire is Important
Firstly, patching a bike tire saves you money. Comparatively cheaper than replacing an entire inner tube, a patch extends the life of a punctured tube. Plus, it’s environmentally friendly!
Secondly, it’s a handy skill for sudden, mid-journey punctures. Once mastered, you can fix a flat tire anywhere, anytime, ensuring your ride stays smooth and uninterrupted.
Factors to Consider When Choosing the Right Glue for Patching a Bike Tire
So, what glue should be used for this?
- Type of Glue: Well, special adhesives called vulcanizing solutions are preferable. They don’t merely stick the patch onto the tube surface, but actually bond the patch and tube together at a molecular level, creating an airtight seal.
- Working Time: Pay attention to the time the glue needs to dry effectively. A shorter drying time allows quicker tire fixing.
- Durability: The durability of the glue is critical. A durable adhesive ensures the patch doesn’t peel off, providing a long-lasting solution.
- Easy to Use: Lastly, the adhesive should be easy to apply and handle.
Remember, repairing a punctured bike tire with durable, reliable glue keeps your cycling adventures packed with excitement and free from frustration.
Here is a quick table summing up what to look for in bike tire patch glue:
| Factors | Importance |
| Type of Glue | Patching a bike tire requires a specific kind of adhesive: a vulcanizing solution. |
| Working Time | The quicker the glue dries, the faster you can get back on the road. |
| Durability | The glue has to be durable to ensure the patch doesn’t peel off over time and withstand various weather conditions. |
| Easy to Use | The adhesive should be user-friendly, allowing easy application and handling. |
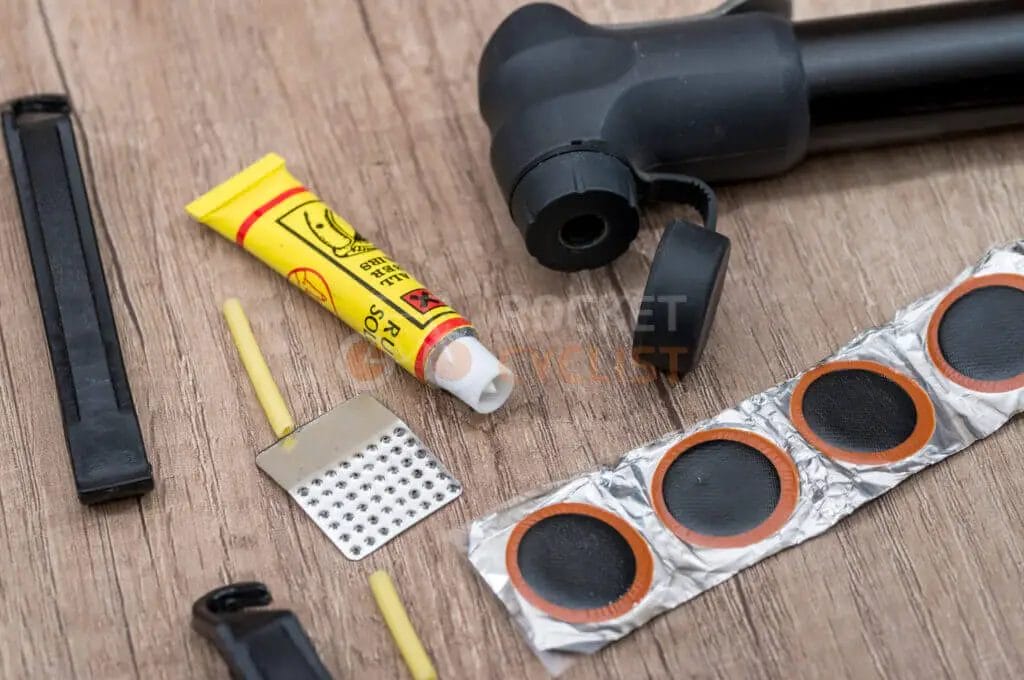
Rubber Cement
There exists a range of adhesives out there, but when it comes to patching a bike tire, a tube of rubber cement is typically your savior. You must be wondering why rubber cement as a tire fix solution?
Overview of rubber cement as a suitable glue for patching bike tires
Rubber cement is a specialized adhesive primarily used in bonding flexible materials, and a go-to for bike tire repairs primarily due to its flexibility, durability, and water resistance.
Being a staple of bike repair kits, it forms a secure and reliable bond with the rubber of your tire, turning into a robust shield that remains supple, securing the patch to the inner tube and keeping the puncture sealed off.
Application process of using rubber cement for tire patches
To utilize rubber cement to repair your bike tire:
Step 1: Identify the punctured region on the tire and clean it.
Step 2: Using sandpaper (most repair kits come with this), lightly scrub the area around the puncture.
Step 3: Apply enough rubber cement to form a bed slightly larger than the patch you will be using.
Step 4: Place the patch over the glue and apply firm pressure, ensuring it adheres to the tube.
Benefits and drawbacks of using rubber cement
The usage of rubber cement ensures flexibility and durability of the repaired area. Despite the level of flex and twist in a bike tire, the rubber cement helps maintain the patch in its rightful place.
However, bear in mind that although rubber cement is robust, it doesn’t make your tire puncture-proof. Protecting your bike tires from sharp objects remains an essential practice you should uphold.
Nonetheless, don’t let the occurrence of a tire puncture stop you from embarking on your next ride. Armed with a simple tube of rubber cement, you’re well-equipped to confront and repair those annoying tire punctures.
Vulcanizing Glue
Quick flat? Take a deep breath because it’s nothing to panic about. In your DIY bike repair arsenal, there’s a small pot of magic known as vulcanizing glue.
Explanation of Vulcanizing Glue and Its Effectiveness in Patching Bike Tires
First thing’s first, what is this miracle adhesive you may ask? Vulcanizing glue is a type of adhesive specifically designed to mend rubber items, including your beloved bicycle tire. It’s also known as a cold vulcanizing solution because it can achieve the same results as the industrial vulcanization process without requiring heat.
Thankfully, it can save your bike ride from ending prematurely due to a pesky puncture!
Step-by-Step Guide on Using Vulcanizing Glue
Applying vulcanizing glue is like garage mechanic 101 – it’s a straight-forward process:
Step 1: First, remove the bike tire and inner tube. Locate the puncture site.
Step 2: Gently buff the damaged area with sandpaper or an emery cloth to smooth the surface – this will help the glue adhere better.
Step 3: Apply a thin layer of your vulcanizing glue to the affected area and wait until it’s tacky.
Step 4: Place the bike tire patch over the glue, applying pressure for a few minutes to ensure secure bonding.
Step 5: Once it’s dry, inflate the tire and look! You’re back on the road again!
Advantages and Disadvantages of Vulcanizing Glue for Tire Patching
Note the Pros: Vulcanizing glue is quick and effective for small punctures, it bonds the patch and tire together creating a firmer, air-tight seal that basically merges them into one.
But Remember the Cons: It can be tricky to apply. It’s potent stuff, which means it can be messy. Also, it’s less effective on larger tears or splits, so it may not be a suitable solution for all types of tire damage.
To wrap up, when it comes to patching up bike tires, vulcanizing glue brings a great balance between convenience and performance. Keep it in your bike bag, and you’ll be equipped to face those puncture emergencies. Remember, it’s you, your bike, and the open road – don’t let a little puncture stand in the way.
Epoxy Adhesive
Desperate to patch that annoying bike tire that keeps getting in the way of your cycling trips? Perhaps, it’s time you tried epoxy adhesive. Not only is it effective, but it’s quite straightforward to use, and yes, it’s compatible with bike tire patching!
Overview of epoxy adhesive and its compatibility for bike tire patching
Epoxy adhesive comprises two parts: a resin and a hardener. When combined, they create a robust, durable adhesive that can bond most surfaces, including rubber, which, incidentally, makes up your bike tires.
Epoxy adhesive works great when you need to patch a bike tire because of its strong bonding power, even under warm and heavy operational conditions typical of bicycle tires. Therefore, your tires stay patched and you stay on track!
Application process and curing time for epoxy adhesive
Applying your epoxy adhesive isn’t as complicated as you might think. First things first, clean the area you intend to patch. Any dirt or grime might interfere with the bonding process. Next, mix the epoxy resin and hardener and apply a moderate amount to the patch, then firmly press it onto the tire.
Don’t rush the process. Normally, the epoxy needs around 24 hours to fully cure. During this period, the bond strengthens and will end up as a sturdy patch, capable of overcoming high pressure and heat conditions.
Pros and cons of using epoxy adhesive for patching bike tires
While advantageous in many respects, using epoxy adhesive also has a few drawbacks you should be aware of.
On the upside, epoxy offers a robust and durable patch that withstands pressure and heat well. It’s also versatile and can bond many different materials, so it’s great if you have multiple patching missions!
The downside lies mainly in the curing time which can be lengthy compared to other adhesives. And while it’s versatile, it might not be the most suitable adhesive for all types of bike tire damage.
In any case, it’s advisable to consider the type of damage before selecting your adhesive. And remember, if you’re unsure or the damage is major, consult a professional!
Conclusion
In the end, knowing the appropriate adhesive to use can make all the difference in successful bike tire patching. The most common options are rubber cement, vulcanizing glue, and epoxy adhesive.
Comparison between rubber cement, vulcanizing glue, and epoxy adhesive for bike tire patching
Rubber cement is a common choice due to its easy application and adequate bonding strength. It’s perfect for quick fixes as it dries rapidly. Meanwhile, vulcanizing glue is more potent. It chemically bonds the patch to the tube, making the repair more durable.
On the other hand, epoxy adhesive offers superior strength, but its lengthy curing time and complex preparation often deter cyclists.
Recommendations based on different tire damage scenarios
If you have a small puncture, rubber cement will likely do the trick. For larger cuts or significant tire damage, opting for the superior strength of an epoxy adhesive might be beneficial.
However, for an excellent balance of strength, ease of use, and fast drying time, vulcanizing glue tends to be the go-to choice, regardless of the tire damage magnitude.
Safety precautions and additional tips for successful bike tire patching
Safety always comes first. Always wear protective gloves when handling any adhesive. Ensure you are working in a well-ventilated space to avoid inhalation of potentially harmful fumes.
In addition, a good practice to imbibe is cleaning the area around the puncture thoroughly before applying the glue. A neat, dry work area ensures that your patch adheres properly to the tire.
Gluing is just the start. Allow ample drying time before putting your bike back on the road. This waiting period ensures that the patch firmly bonds with the tire, thereby prolonging its lifespan. Using the correct adhesive and adhering to safety steps, you’ll quickly be back to pedaling in no time!