Last Updated on October 21, 2023 by Vinson Lozano
As an avid cyclist or a bike mechanic, you understand that your bicycle’s crank arm is like the heart of your bike. It’s what converts your leg efforts into the rotation of the chainrings, which eventually propels your bike forward. To function optimally, this crucial component requires proper tightening, which leads us to the topic of torque.
Understanding the importance of torque in crank arm tightening
Let’s break it down. In simple terms, torque is twisting or turning force. It’s the force that makes your bike parts rotating and working together smoothly. When it comes to tightening your crank arm, getting the torque just right is incredibly important.
Why is that crucial, you ask? An under-tightened crank arm can loosen over time, leading to wobbling, damaging threads, or even falling off mid-ride, which could potentially lead to an accident. On the contrary, an over-tightened crank can cause pressure which can crack or warp components, leading to premature wear and tear.
So, what is the correct torque for tightening a crank arm?
There’s not a one-size-fits-all answer. The correct torque can vary based on the specific make and model of your bike. However, generally, it ranges from 12 to 14 Newton-meters (Nm) for aluminum cranks, and 35 to 40 Nm for carbon ones. Always refer to your bicycle’s manual or consult with a professional for your specific bike’s recommended torque.
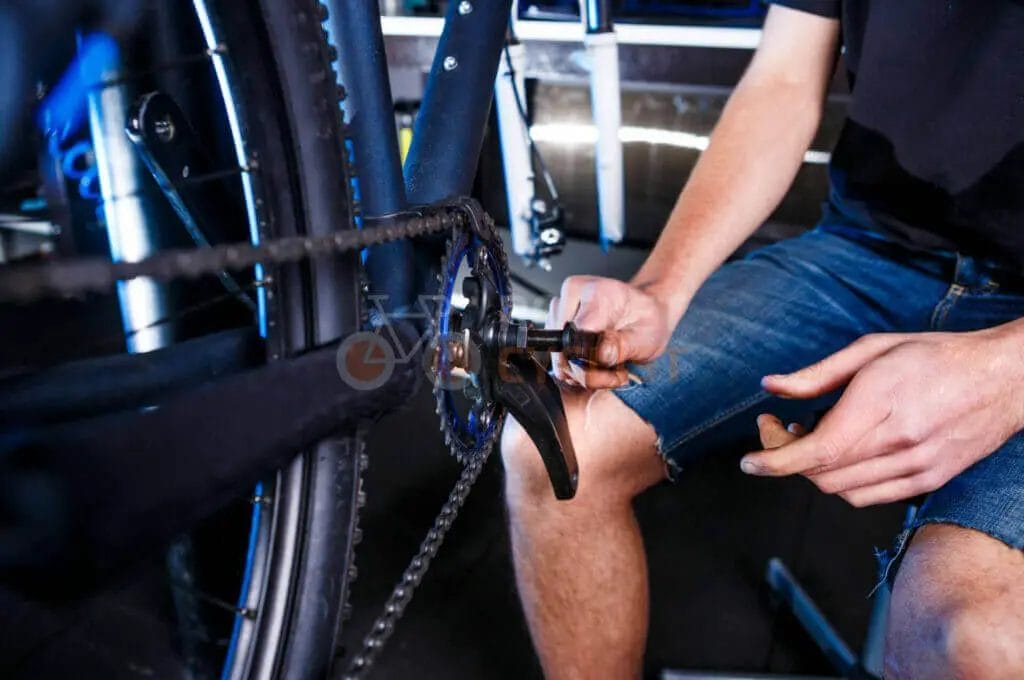
Types of Crank Arm Bolts
When it comes to looking after your bicycle, it’s imperative that you understand all the nuts and bolts quite literally! Among these, one of the crucial components you need to manage correctly is the crank arm bolt.
Different crank arm bolt systems and their torque specifications
Dealing with different types of crank arm bolts calls for specific knowledge about the torque required for each. However, remember that these values can vary based on the manufacturer and the specific model of your bike. Here are some general guidelines.
Single Bolt Systems: If you have a single bolt system, like a Shimano Hollowtech II, you’re dealing with a pinch bolt method where the preload on the bearings is set first. After this initial adjustment, the actual tightening torque to be applied usually ranges from 12 to 14 Nm.
Two Bolt Systems: For a two bolt system, such as those on Campagnolo and older Shimano models, the appropriate torque will generally be between 35 to 50 Nm.
Self-Extracting Systems: In the case of self-extracting systems, the bolt doubles as a crank-removal tool and usually requires a torque around 45 to 55 Nm.
Be sure to check the specifications listed by the manufacturer to get precise torque settings for your particular crank arm bolt.
Torque Values for Different Crank Arm Bolts
As an avid cyclist or a bike maintenance enthusiast, you might have faced the need to tighten your crank arm. This seemingly simple process requires careful attention, mainly because an accurately tightened crank arm ensures the longevity of your bicycle and your safety while riding.
Specified torque ranges for various crank arm bolt types
When tightening your crank arm, it is crucial to understand the different torque specifications for various kinds of crank arm bolts. Failing to do so might result in unfortunate bicycle mishaps. If you are working with a square taper crank, the torque varies between 25 and 30 Nm. For an external bearing crank arm, the torque ranges from 40 to 50 Nm. As for a two-piece crankset, the torque is usually mentioned by the manufacturer, but it normally falls around 12 to 14 Nm.
As a general rule, always remember that a little bit of grease or other appropriate lubricants on the bolt threads can help achieve an accurate and proper torque. Likewise, regularly checking and adjusting the torque of your crank arm bolt can go a long way in prolonging the life of your bike and ensuring your rides will always be smooth and safe!
Using a Torque Wrench
The proper technique for using a torque wrench to tighten crank arms
If you’re assembling or maintaining a bike, it’s important to know the proper torque for tightening the crank arms. This ensures that they are securely fastened without risking damage or failure. Here’s what you need to know:
- Refer to the manufacturer’s specifications: Different bike models and cranksets may have specific torque requirements. Check the manufacturer’s website or user manual for the recommended torque value.
- Use a torque wrench: A torque wrench is a tool designed to apply a specific amount of torque to a fastener. This ensures that you don’t overtighten or undertighten the crank arms. Set the torque wrench to the specified value.
- Apply the torque: Attach the appropriate socket or hex head to the torque wrench and insert it into the crank arm bolt. Slowly and steadily apply force to reach the desired torque value. It’s important not to rush or use excessive force.
- Check for any movement: After applying the correct torque, check for any movement or play in the crank arm. If the crank arm still moves, you may need to tighten it further. If it feels too tight or binds, you may have overtightened it.
- Double-check the torque: If possible, double-check the torque after a short ride or period of use. Crank arms can sometimes settle or shift slightly, so it’s good practice to ensure they’re still properly tightened.
By following these steps and using a torque wrench, you can ensure that your crank arms are securely fastened to the proper torque. This promotes safety, longevity, and optimal performance for your bike.
Common Mistakes and Dangers
Potential issues and risks associated with incorrect crank arm tightening
If you’re a cyclist or someone who maintains their own bike, you might have wondered about the proper torque for tightening the crank arm. It’s essential to tighten it correctly to ensure optimal performance and prevent any potential issues or accidents. Here are some common mistakes and dangers associated with incorrect crank arm tightening:
- Loose Crank Arm: Failing to tighten the crank arm properly can lead to it becoming loose during cycling, resulting in a wobbly or unstable ride. This not only affects your comfort but also puts you at risk of losing control and causing accidents.
- Damage to Bearings: Over-tightening the crank arm can damage the bearings, which are crucial for smooth pedaling. Excessive force can cause the bearings to wear out prematurely and lead to a decrease in performance.
- Stripped Threads: Applying too much torque or using the wrong tool can strip the threads on the crank arm or the crankset. This can make it difficult to remove or replace the crank arm in the future, requiring costly repairs or even a complete replacement.
To avoid these issues and dangers, it’s recommended to consult your bike’s manufacturer for the specific torque specifications. Investing in a quality torque wrench can help ensure that you tighten the crank arm to the correct torque, providing a safe and enjoyable cycling experience.
Remember, proper maintenance and attention to detail can go a long way in keeping your bike in excellent condition and ensuring your safety on the road or trail.
Tips for Proper Crank Arm Tightening
Best practices and recommendations for ensuring correct torque
Properly tightening the crank arm is essential for the smooth operation and longevity of your bike. It’s important to apply the correct amount of torque to prevent issues such as loosening, creaking, or even damaging the crankset. Here are some tips to ensure you get it right:
- Use a torque wrench: To achieve the correct torque, it’s recommended to use a torque wrench specifically designed for bicycle maintenance. This tool allows you to apply the desired amount of force accurately.
- Refer to manufacturer guidelines: Different cranksets may have different torque requirements. Be sure to consult the manufacturer’s guidelines or specifications to determine the appropriate torque for your specific crank arm.
- Apply grease: Before tightening the crank arm, apply a thin layer of grease to the spindle interface. This helps to reduce friction and ensures a smooth installation.
- Alternate the tightening: When tightening the crank arm bolts, it’s best to alternate between them rather than fully tightening one before moving to the next. This helps to distribute the torque evenly and minimizes stress on the crank arm.
- Double-check: After tightening the crank arm bolts, give them a final check to ensure they are properly secured. Make sure there is no play or movement in the crankset when applying pressure.
By following these tips and using the correct torque, you can ensure that your crank arm is properly tightened, reducing the risk of issues and maintaining the performance of your bike. Remember, if you’re unsure or don’t have the necessary tools, it’s always best to seek professional assistance.
Conclusion
Ensuring proper torque for tightening your crank arm is vital for maintaining the performance and longevity of your bike. By following the recommended torque specifications, you can avoid potential damage to your bike and ensure that the crank arm is securely fastened.
Summarizing the significance of proper crank arm tightening and its impact on bike performance
- Prevention of damage: Tightening the crank arm to the correct torque specification helps prevent it from becoming loose during rides, which can lead to damage to the crank arm, bottom bracket, or other components.
- Optimal power transfer: Properly tightened crank arms provide optimal power transfer from your legs to the pedals, enhancing your cycling efficiency and performance.
- Reduced creaking and noise: Incorrectly tightened crank arms can result in creaking or clicking noises during pedaling. Following the recommended torque values can minimize these distractions and ensure a smooth and silent ride.
- Enhanced safety: Loose or improperly tightened crank arms can pose a safety risk, potentially causing accidents or injuries. By tightening them correctly, you ensure the reliability and stability of your bike.
Remember, it is crucial to consult your bike manufacturer’s guidelines or torque specifications to determine the appropriate torque value for your specific crank arm. Investing in a torque wrench can also help you achieve accurate and consistent torque settings for your bike components, including the crank arm.