Last Updated on March 29, 2024 by Vinson Lozano
Understanding the Issue of Bike Chain Slipping
When you’re out on your bike, there’s nothing more frustrating than experiencing a bike chain slipping when you pedal hard. This issue can make it difficult to generate power and maintain control on the road or trail.
Understanding the root causes of chain slipping can help you troubleshoot and resolve the issue, ensuring a smooth and enjoyable ride.
Chain slipping, also known as chain skipping or chain skip, occurs when the bike’s chain doesn’t properly engage with the teeth on the cassette or chainring. Instead of transferring power efficiently, the chain slips or jumps, causing a loss of momentum and making it difficult to maintain a steady cadence.
Several factors can contribute to chain slipping, including:
1. Worn Chain: Over time, the chain on your bike can stretch and wear, especially if it’s not regularly maintained or replaced. A stretched chain has difficulty engaging with the teeth on the cassette, causing it to slip under pressure.
2. Worn Cassette: The cassette, which is the set of gears on the rear wheel, can also wear out over time. As the teeth become worn or damaged, they may not properly grip the chain, leading to slipping.
3. Chainring Issues: The chainring, which is the gear attached to the pedal crank, can also be a source of chain slipping. Worn or damaged teeth on the chainring can prevent the chain from fully engaging.
4. Incorrect Shifting: Improper shifting technique can also lead to chain slipping. Shifting under heavy load or shifting too abruptly can cause the chain to skip. Click here to learn more about proper gear shifting.
5. Insufficient Lubrication: A lack of lubrication on the chain can increase friction and make it more prone to slipping. Regularly lubricating the chain can help reduce friction and improve overall performance. You can use a regular chain lube from your local store or premium chain wax that can last longer.
To fix the issue of chain slipping, you can try the following steps:
1. Check Chain Wear: Use a chain checker tool to determine if your chain is stretched beyond its recommended limit. If it is, replacing the chain may solve the slipping issue.
2. Check Cassette Wear: Examine the teeth on the cassette. If they are worn or damaged, it may be time to replace the cassette.
3. Inspect Chainring Condition: Look closely at the teeth on the chainring. If they are worn or damaged, consider replacing the chainring to improve chain engagement.
4. Adjust Shifting Technique: Practice shifting smoothly and avoid shifting under heavy load. This can help reduce strain on the chain and minimize the risk of slipping.
5. Regularly Lubricate the Chain: Apply a suitable lubricant to the chain regularly to reduce friction and improve overall performance. Be sure to clean the chain thoroughly before applying lubrication.
By addressing these potential issues and taking the necessary steps to maintain your bike’s chain and gears, you can minimize the risk of chain slipping and enjoy a smoother and more efficient ride. Remember to regularly inspect and service your bike to keep it in optimal condition.
By maintaining your bike and addressing any issues promptly, you can ensure a safe and enjoyable riding experience. If you are unsure about any repairs or adjustments, it is always recommended to consult a professional bike mechanic. Happy riding!
Common Causes of Bike Chain Slipping

If you’re experiencing your bike chain slipping when pedaling hard, there are several possible causes that you should be aware of. Here are some common reasons why this issue may occur:
1. Worn Out Chain or Cassette
One of the most common causes of bike chain slipping is a worn-out chain or cassette. Over time, the chain can stretch and the teeth on the cassette can wear down, leading to poor engagement between the chain and the gears. This can result in the chain slipping or skipping when you put pressure on the pedals. If you notice that your chain or cassette shows signs of wear, it’s important to replace them to ensure smooth and reliable gear shifts.
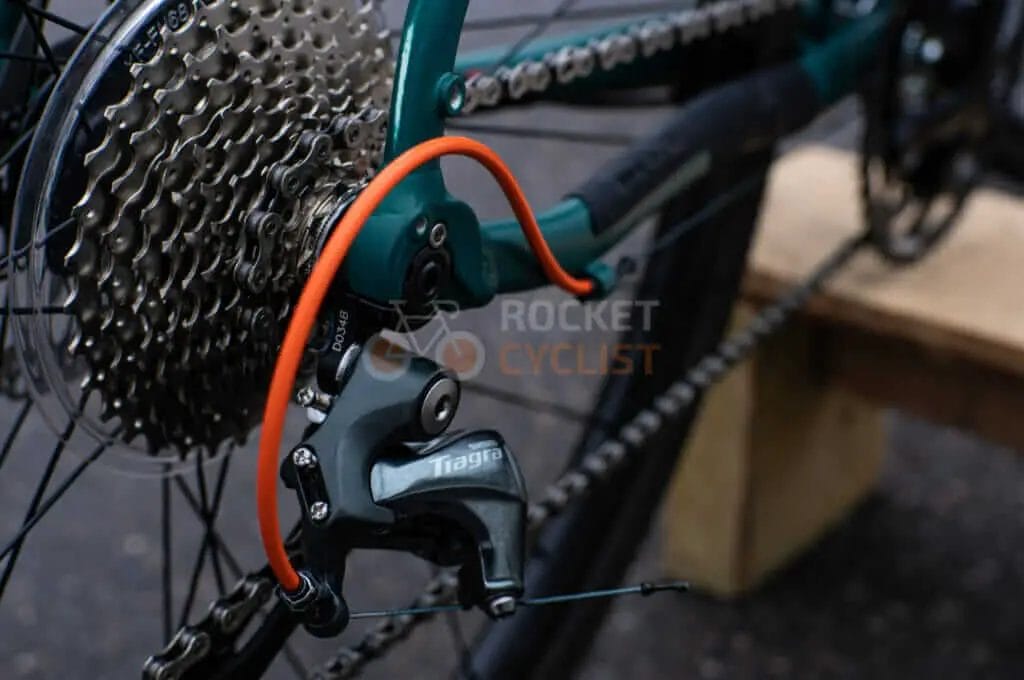
2. Misaligned Derailleur
A misaligned derailleur can also cause the bike chain to slip. The derailleur is responsible for moving the chain from one gear to another. If it’s not properly aligned, it may not guide the chain onto the gears accurately, causing it to slip. You can check the alignment of your derailleur by visually inspecting it or consulting a bike mechanic if you’re unsure. Aligning the derailleur properly can help resolve the slipping issue.
3. Loose Chain Tension
Another possible cause of chain slipping is loose chain tension. If your chain is not properly tensioned, it may not sit tightly on the gears, leading to slipping when you apply force to the pedals. To address this issue, you can adjust the tension of your chain by either tightening or loosening it as necessary. It’s important to find the right balance of tension to ensure smooth and reliable gear changes.
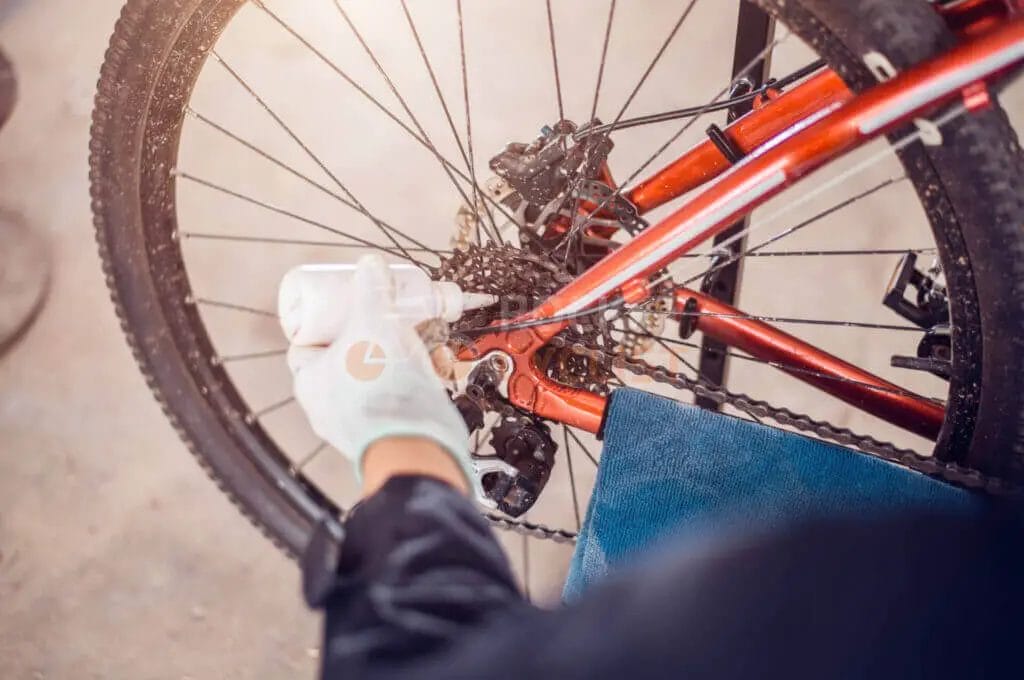
4. Dirty or Lubrication Issues
Dirt, debris, and lack of proper lubrication can also contribute to chain slipping. When the chain is dirty or dry, it may not move smoothly over the gears, resulting in slipping. It’s important to regularly clean and lubricate your chain to keep it in optimal condition. Use a chain cleaning tool and a bicycle-specific lubricant to remove dirt and ensure smooth movement of the chain. Regular maintenance and cleanliness can go a long way in preventing chain slipping issues.
It’s important to note that these are just a few common causes of bike chain slipping. Other factors, such as worn-out jockey wheels, a damaged chainring, or a malfunctioning shift cable, can also contribute to this problem. If you’re unable to identify or resolve the issue on your own, it’s always a good idea to consult a professional bike mechanic for further assistance.
By addressing these common causes promptly and taking good care of your bike’s drivetrain, you can prevent chain slipping and enjoy a smooth, efficient, and enjoyable riding experience.
How to Fix Bike Chain Slipping When Pedaling Hard

Experiencing a bike chain slipping when pedaling hard can be frustrating and inconvenient, but luckily, there are several steps you can take to fix this issue. Here are some solutions to help you address and resolve the problem:
1. Checking and Replacing Worn Out Components
One common reason for a bike chain slipping is worn-out components. Over time, the chain, cassette, and chainrings can become worn and develop a rounded shape, which results in poor engagement and slipping. Here’s what you can do:
- Inspect the chain for signs of wear. If the chain shows significant elongation or signs of damage, it may be time to replace it.
- Check the cassette for worn teeth. Worn teeth will have a hooked or pointed shape. If you notice this, it’s time to replace the cassette.
- Examine the chainrings for signs of wear. Worn chainrings will have a “shark tooth” appearance and may need to be replaced.
Replacing these worn-out components should help improve the chain’s engagement and prevent slipping.
2. Adjusting the Derailleur
Another possible cause of a slipping chain is a misadjusted derailleur. A misaligned derailleur can result in improper chain tension and cause the chain to slip. Here’s how to adjust the derailleur:
- Shift the bike into the smallest chainring and smallest rear cog.
- Loosen the derailleur cable anchor bolt.
- Use the barrel adjuster on the derailleur or shifters to fine-tune the alignment of the derailleur. The goal is to position the jockey wheel directly below the smallest rear cog.
- Tighten the derailleur cable anchor bolt.
By properly adjusting the derailleur, you can ensure that the chain maintains proper tension and reduces the chances of slipping.
3. Ensuring Proper Chain Tension
An overly loose or tight chain can also lead to slipping. Here’s how you can ensure proper chain tension:
- Shift the bike into the smallest chainring and the smallest rear cog.
- Loosen the rear wheel axle nuts or quick-release skewer.
- Push the rear wheel forward or backward to adjust the tension of the chain.
- Retighten the rear wheel axle nuts or quick-release skewer.
The goal is to have the chain tensioned enough that it doesn’t have excessive slack but not so tight that it restricts the rotation of the pedals.
4. Cleaning and Lubricating the Chain
A dirty or dry chain can cause friction and lead to chain slipping. Regularly cleaning and lubricating the chain will ensure smooth operation. Here’s what you can do:
- Use a chain cleaning tool or a rag to remove any dirt and grime from the chain.
- Apply a bicycle-specific chain lubricant to the chain, ensuring that each link is coated.
- Wipe off any excess lubricant.
Regular maintenance and lubrication of the chain will help reduce friction and improve overall performance.
By following these steps, you can address the issue of a bike chain slipping when pedaling hard. Remember to regularly inspect and maintain your bike’s components to prevent future problems. Enjoy a smooth and reliable ride!
Preventive Measures to Avoid Bike Chain Slipping

1. Regular Maintenance and Inspection
One of the best ways to prevent bike chain slipping is to ensure regular maintenance and inspection of your bike. Here are some essential tips to help you maintain your bike and keep the chain in top condition:
- Clean the Chain: Regularly clean your bike chain to remove dirt, grime, and debris that can cause it to slip. Use a degreaser and a brush to thoroughly clean the chain, then rinse it with water and dry it properly. A clean chain not only enhances performance but also prevents slippage.
- Lubricate the Chain: After cleaning, apply a suitable lubricant to the chain. This helps reduce friction and ensures smooth movement. Use a lubricant specifically designed for bike chains and apply it evenly along the entire length of the chain.
- Check Chain Tension: A loose chain can easily slip while pedaling hard. Regularly check the tension of your bike chain and adjust it if necessary. The correct tension is when the chain can be lifted slightly without sagging. Consult your bike’s manual or a professional bike mechanic for guidance on adjusting chain tension.
- Inspect Chain Wear: Over time, the chain can stretch and wear out, increasing the likelihood of slipping. Use a chain wear indicator tool to check the wear and elongation of the chain. If the wear exceeds a certain threshold, it is recommended to replace the chain to maintain optimal performance and prevent slipping.
- Check Cassette and Chainrings: Inspect the cassette (rear gears) and chainrings (front gears) for signs of wear or damage. Worn teeth on the cassette or chainrings can cause the chain to slip. If you notice any issues, consider replacing the worn components to ensure smooth and reliable gear shifting.
- Ensure Proper Gear Shifting: Improper gear shifting can put unnecessary stress on the chain, leading to slipping. Learn and practice proper gear shifting techniques to avoid sudden or jerky shifts that can strain the chain. Anticipate gear changes in advance and shift smoothly to prevent unnecessary strain.
- Maintain Proper Bike Fit: An improperly fitted bike can contribute to chain slipping. Ensure that your bike is properly adjusted to your body size and riding style. A professional bike fit can help optimize your riding position and reduce the likelihood of chain slipping.
- Regularly Inspect and Maintain Other Drive Train Components: The chain is just one part of the bike’s drive train system. Regularly inspect and maintain other components such as the derailleur, derailleur hanger, shifters, and cables to ensure they are functioning properly. These components work together to ensure smooth gear shifting and reliable performance.
By following these preventive measures and maintaining your bike regularly, you can significantly reduce the risk of chain slipping while pedaling hard. Remember, if you are unsure or encounter persistent issues, it’s always best to consult with a professional bike mechanic for proper
Signs to Look Out for to Avoid Further Issues

- Frequent Chain Slippage: If your chain slips repeatedly, even after performing maintenance and adjustments, it may indicate a more significant issue with your drivetrain. Consider consulting a professional bike mechanic for a thorough inspection and repair.
- Excessive Noise or Grinding: Unusual noises coming from the chain or drivetrain, such as grinding or clicking, can indicate misalignment or worn-out components. Promptly address these issues to prevent further damage and ensure smooth operation.
- Poor Shifting Performance: Difficulty shifting gears or inconsistent gear changes may be a sign of a worn-out chain, derailleur issues, or other drivetrain problems. Don’t ignore these signs, as they can lead to further complications if not addressed.
- Chain Skipping or Jumping: If your chain skips or jumps between gears, it’s a clear indication of a problem. This can be caused by worn cogs, a bent derailleur hanger, or other drivetrain issues. Professional assistance may be needed to diagnose and resolve the problem.
By following these tips and being mindful of potential issues, you can enjoy a smooth and reliable biking experience without the frustration of a slipping bike chain. Regular maintenance, proper techniques, and prompt repairs will help keep your bike chain in optimal condition, allowing you to pedal hard with confidence.
Remember, if you are unsure or uncomfortable performing maintenance or repairs on your bike chain, it’s always best to seek assistance from a professional bike mechanic to ensure the safety and longevity of your bike’s drivetrain.