Last Updated on February 10, 2024 by Vinson Lozano
So, you’ve returned from your latest biking excursion and are ready to store your gear, but your bike rack is stuck in the hitch. This minor setback is not just inconvenient; it can become a significant obstacle if not tackled correctly. Understanding how bike racks and hitch receivers work together and the common reasons behind them getting stuck will be your first step in resolving the issue.
Explanation of bike racks and hitch receivers
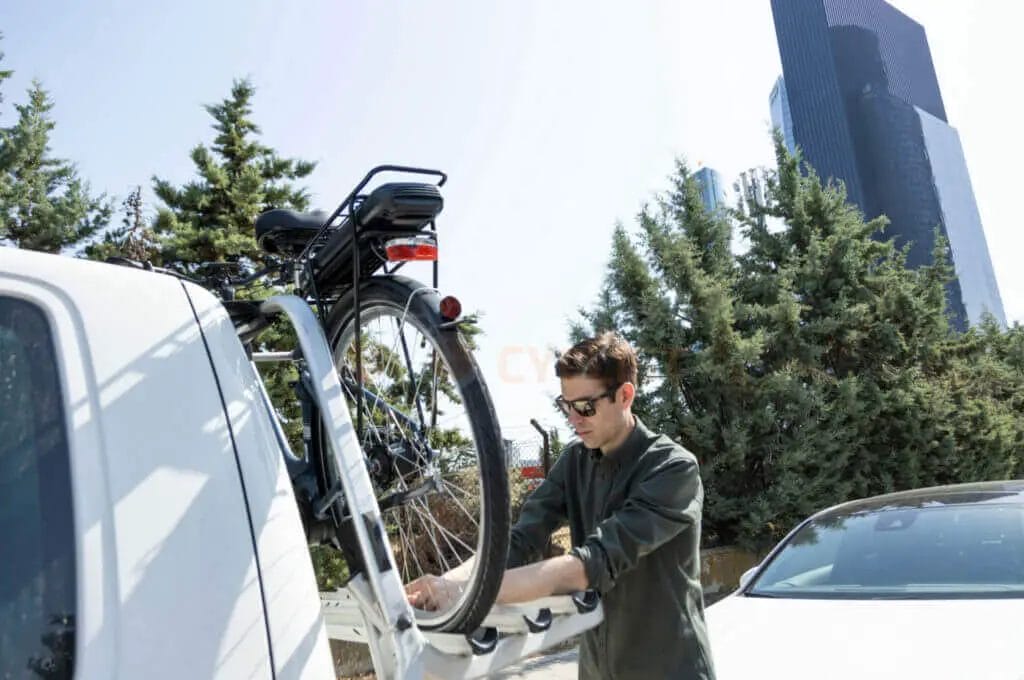
Bike racks are designed to easily attach to a vehicle’s hitch receiver, providing a secure and accessible way to transport bicycles. Hitch receivers themselves are mounted to the frame of your vehicle and come in various sizes, most commonly 1.25 and 2 inches. The bike rack slides into the receiver, and a locking pin or bolt holds it in place.
Common reasons for a bike rack getting stuck in a hitch
There could be several factors at play when you find your bike rack stubbornly clinging to the hitch. Corrosion is often the number one culprit, especially if you live in an area with harsh weather or if your rack has not been removed for a long period. Debris, dirt, or rust can build up, making it difficult to dislodge the rack. Another possibility is a bent locking pin due to stress or an accident. Finally, an incorrectly fitted rack, swelling of the hitch receiver, or overtightened anti-wobble bolts can all lead to the frustrating situation you’re facing. Now that you know the potential causes, it’s critical to address them safely and effectively to free your bike rack without damaging your vehicle or equipment.
How to Remove a Stuck Bike Rack
Dealing with a stuck bike rack can be frustrating, but there’s no need to worry. With the right approach, you can remove the bike rack and get on with your day. Here’s a step-by-step guide that’ll help you tackle the task effectively without causing harm to your vehicle or bike rack.
Step-by-step guide to removing a stuck bike rack
Firstly, assess the situation carefully. Check the hitch and bike rack for visible damage or debris. If it’s safe to proceed, begin by spraying a penetrating lubricant generously around the hitch receiver and the points where the bike rack connects. Give it some time to work through the rust and corrosion.
Next, ensure your vehicle is on level ground and apply the parking brake for stability. Wiggle the bike rack gently back and forth to gauge its movement. If it still won’t budge, locate the locking mechanism and check for any bent pins or other damage. You may need a set of pliers or a hammer to gently tap out a bent locking pin.
If the rack remains stuck, gradually increase the amount of force you’re applying as you wiggle it. Should these efforts yield no results, it’s time to consider leveraging a solid piece of wood or a rubber mallet to gently but firmly tap the rack. This can sometimes break free the corrosion causing the jam.
Using lubricants to loosen stuck bike racks
One of the most effective tools in your arsenal is a good quality penetrating lubricant. Rust and corrosion are common reasons for a bike rack to become stuck, and lubricants can penetrate these corrosive bonds and make removal easier. Spray the lubricant around all the joints and mechanisms that connect the bike rack to your vehicle’s hitch receiver. While you let it soak in, keep in mind it might take several applications depending on the severity of the situation.
If lubricant alone doesn’t do the trick, consider using a combination of heat and cold — warming up the receiver with a hairdryer or heat gun and then applying a cold spray. The rapid temperature change can cause metal to expand and contract, potentially breaking the corrosion’s grip. However, use caution with this method to avoid damaging your vehicle or bike rack.
Always wear protective gear such as gloves and safety glasses when attempting to remove a stuck bike rack, and if these methods fail, it’s wise to seek professional assistance to avoid injury or further damage.
Tools You’ll Need
So, you’ve encountered a stuck bike rack — a common stumbling block for many biking enthusiasts. Fortunately, effective tools and methods exist to help you overcome this pesky problem. In this segment, we outline key tools and products that can aid in your quest to detach that stubborn bike rack, ensuring you are well-equipped to handle the situation with ease.
Essential tools for removing a stuck bike rack
When you’re in the trenches battling a stuck bike rack, your arsenal of tools can make all the difference. Begin with a set of basic hand tools: an adjustable wrench, pliers, and a hammer can come in handy. A set of socket wrenches might also be required for loosening bolts or nuts. Moreover, a solid piece of wood or a rubber mallet can be invaluable for tapping the rack gently to dislodge it without causing damage.
Additionally, keeping a penetrating lubricant within reach is smart, for it will often be your first line of defense. Don’t forget safety equipment, like gloves and safety glasses, to protect yourself from any mishaps during the process.
Recommended lubricants for easier removal
The type of lubricant you use could be the deciding factor between a strenuous ordeal and a smooth removal. For best results, choose a high-quality penetrating oil like WD-40 or Liquid Wrench. These lubricants are designed to seep into tight spaces and break down rust and corrosion, aiding in the effortless release of the rack.
In certain scenarios, a combination of heat and cold sprays may expedite the process. Be cautious with this technique, and only use it as a last resort, as the sudden temperature change can also affect your vehicle’s paint or finish. Always read labels and use products according to their instructions to prevent unintended damage.
With these tools and lubricants at your disposal, you’ll increase your chances of a hassle-free bike rack removal and safeguard your vehicle and bike rack from harm.
Common Issues and Solutions
Identifying common issues with stuck bike racks
Struggling with a bike rack that just won’t budge from the hitch of your vehicle can be exasperating. It’s a frequent yet preventable problem many cyclists face. The culprits? Often, it’s due to corrosion or rust that has formed over time, especially if the bike rack is exposed to the elements or seldom removed. Another issue could be the hitch pin getting stuck, either by being bent or jammed due to dirt and grime build-up. Sometimes, the rack’s moving parts can seize, especially if they are not regularly lubricated or maintained. Recognizing these common problems is the first step to addressing them, so you can get back on the road and continue your biking adventures without further hassle.
Troubleshooting techniques for each issue
When it comes to rust and corrosion, applying a penetrating oil is your best bet. Generously coat the affected area and allow it to sit for a few minutes. This time will enable the oil to work its way into the crevices and loosen any rust that’s keeping the rack stuck. If the issue is a bent or jammed hitch pin, carefully inspect and clean around the pin area before using tools to gently coax it out without causing additional damage to your vehicle or the bike rack. In case the rack’s components have seized, a proactive approach with regular lubrication can prevent this in the future. Applying a silicone-based lubricant to all moving parts after each use can keep them functioning smoothly. Keep in mind that with all these troubleshooting techniques, patience and care are key. If manual methods fail, seeking professional assistance is a wise next step to avoid damaging your gear or vehicle.
Preventing Bike Rack Stuck in Hitch
Tips to prevent bike rack from getting stuck in the hitch
To avoid the frustration of a bike rack that’s stuck in your hitch, there are several proactive measures you can take. First and foremost, cleanliness is crucial. Make sure to clear any debris, dust, or grime away from the hitch and rack connection points before and after each use. This includes the hitch pin and any moving joint mechanisms on the rack itself. Using a protective spray or grease on the hitch can also create a barrier against rust and corrosion, especially if your rack will be left on your vehicle for extended periods. Furthermore, it’s advantageous to remove the bike rack when not in use for long durations to prevent it from seizing up. Additionally, when installing your bike rack, make sure it is fitted correctly, and the hitch pin is secured but not over tightened, as this could make it difficult to remove later on.
Regular maintenance for smooth operation
For the smooth operation of your bike rack, regular maintenance is a non-negotiable practice. Include periodic inspections in your routine – check for any signs of wear, rust, or damage. If you find rust developing, address it promptly with rust remover or a similar solution before it aggravates. Be diligent about lubricating all moving parts with a high-quality lubricant, which should be done at least once per season, depending on how frequently you use the rack. It’s also a good habit to periodically tighten bolts and screws as vibrations from the road can loosen them over time. By staying on top of these maintenance tasks, you ensure that your bike rack remains in peak condition, reducing the likelihood of getting stuck and ensuring your safety, as well as the safety of your precious cargo.
Getting Professional Help
When to seek professional assistance
Sometimes, despite your best efforts to maintain and care for your bike rack, you might find yourself facing the vexing issue of a rack that’s stubbornly stuck in the hitch. When you’ve tried all the DIY remedies—cleaning, lubricating, and gently wiggling without any luck—it’s time to consider seeking professional assistance. If you’re concerned about potentially damaging your vehicle or bike rack, or if you’ve noticed that the rack seems excessively corroded or damaged, professional help can be invaluable. Experts have the tools and expertise to remove the stuck rack without causing further damage. It’s not just about the convenience, but also about ensuring that the problem is addressed safely and effectively.
Choosing a reliable bike rack technician
Finding a reliable technician to solve your bike rack dilemma requires careful consideration. Start by looking for professionals who specialize in bike racks or automotive accessories. Check reviews and ratings online to gauge the quality of their work from previous customers’ experiences. Word-of-mouth recommendations can also be incredibly helpful; reach out to fellow cycling enthusiasts in your community for referrals. When you contact a potential technician, don’t hesitate to ask about their experience with bike rack issues similar to yours. Reliable technicians will be transparent about their expertise, provide a clear explanation of their approach, and offer a fair estimate without hidden fees. Trusting your equipment to an experienced specialist can offer you peace of mind and get you back to your biking adventures sooner rather than later.
Alternative Bike Rack Options
Exploring Alternative Bike Rack Types
When you’re dealing with a bike rack that’s stuck in the hitch, it might be an opportunity to explore alternative types of bike racks that could prevent this problem in the future. There are several types of bike racks from which to choose, each with its own set of features. Roof-mounted racks, for instance, free up your hitch and are accessible from the sides of your vehicle. Trunk-mounted racks attach to the back of your vehicle using straps, bypassing the need for a hitch entirely. Another option is a spare-tire-mounted rack that connects to the spare tire on the back of some SUVs and off-road vehicles, avoiding the issue of hitch compatibility altogether. Consider your vehicle type, frequency of use, and the number of bikes you typically transport when looking at these alternatives.
Advantages and Disadvantages of Each Option
Each bike rack type has its advantages and disadvantages that you’ll need to weigh. Roof racks, for example, won’t impact access to your car’s trunk but require lifting bikes higher, which might be cumbersome for some people. Trunk-mounted racks are usually more affordable and easier to store when not in use but may not be as secure as hitch or roof racks. Spare-tire racks are specific to certain vehicles and can be a convenient choice if applicable, allowing clear access to the car’s trunk. However, they are limited by the weight they can carry. Consider each type’s ease of installation and removal, security, vehicle compatibility, and how often you plan to use it before making your choice. Your perfect bike rack should balance convenience, security, and accessibility to suit your lifestyle.
Frequently Asked Questions
Answers to common questions about bike rack stuck in hitch
You’ve experienced the frustration of having a bike rack that just won’t budge from your vehicle’s hitch receiver. It’s an inconvenience that could throw a wrench in your cycling plans, but don’t worry, there are solutions and preventative measures you can take. First, ensure that you’re not dealing with a locked hitch pin; if you are, find the key and remove it following the manufacturer’s instructions. If the bike rack is genuinely stuck, try applying a penetrating oil to the hitch pin and wait a few minutes before attempting to remove it again. For stubborn cases, gentle taps with a hammer can encourage movement, but beware of using excessive force which might cause damage. To prevent future headaches, regularly clean and lubricate the hitch pin and receiver, check for rust, and always follow the recommended weight limits to avoid stressing the components.
Proper hitch receiver size and compatibility
When it comes to avoiding the issue of a bike rack getting stuck in your hitch, one key factor is ensuring proper hitch receiver size and compatibility. Hitch receivers come in various sizes, typically 1.25-inch or 2-inch sizes, and it is crucial to match the size of your bike rack’s hitch mount to the vehicle’s receiver. Incompatibility can lead to a loose fit or the inability to insert the rack properly, which might cause it to get stuck. Always double-check the specifications of both your vehicle’s receiver and the bike rack before purchase and use. If you have a rack that is smaller than your receiver, hitch adapters are available but should be used with caution as they can affect stability and safety. Remember that a secure and proper fit is vital not only to prevent the rack from becoming stuck but also to ensure a safe transport of your bikes.
Conclusion
Final thoughts and summary of key points
Dealing with a bike rack stuck in the hitch can be a test of patience, but with the right approach, you can overcome this obstacle and get back to enjoying your bike rides. Remember, the first thing to check is whether the hitch pin is locked and if so, simply locate the key and follow the manufacturer’s removal procedure. If you’re dealing with a stuck rack, don’t hesitate to use a penetrating oil to loosen any corrosion or grime around the hitch pin, followed by appropriate force to dislodge it, being careful not to damage any components.
Prevention is always better than cure, so make a habit of maintaining your bike rack and hitch receiver. Clean and lubricate the hitch pin and receiver regularly, inspect for signs of rust, and adhere strictly to weight limits recommended by the bike rack’s manufacturer to mitigate stress on the hitch components.
Moreover, compatibility between your bike rack and the vehicle’s hitch receiver is essential. Ensure that their sizes match to prevent a poor fit that can cause future issues. In cases where an adapter is necessary, use it judiciously, recognizing that it can potentially compromise stability and safety. For a reliable experience, a correct and secure fit is non-negotiable – it helps not only in avoiding the annoyance of a stuck bike rack but also in guaranteeing the secure transit of your bicycles.