Last Updated on March 29, 2024 by Vinson Lozano
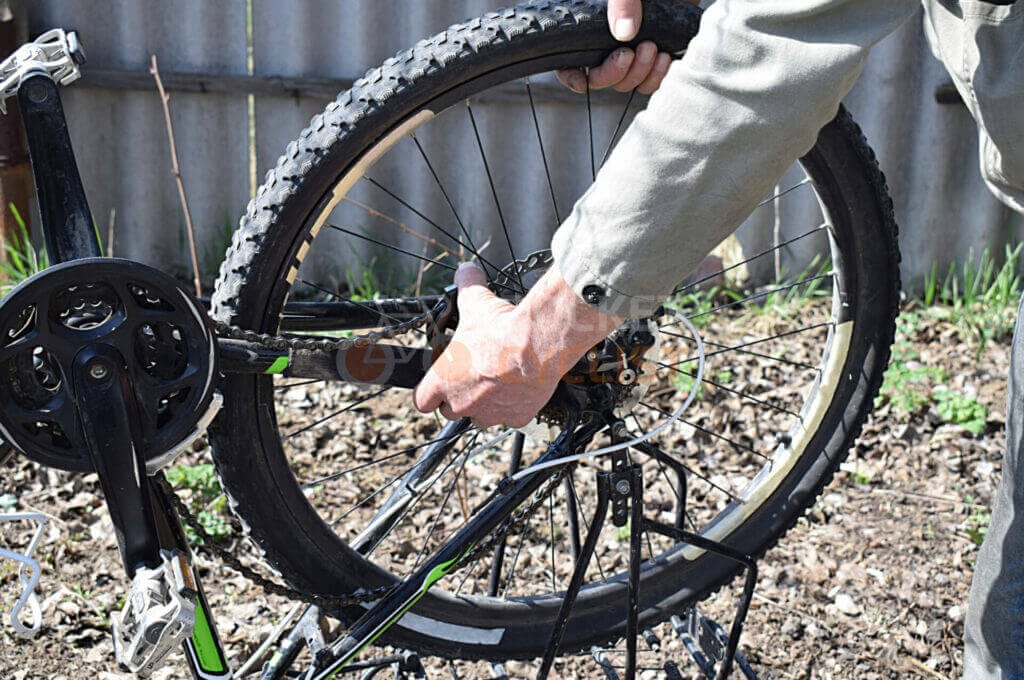
Getting into the intricacies of bicycle maintenance, sooner or later you’ll face the task of removing centerlock rotors. Whether you’re replacing worn discs or upgrading your braking system, doing it right is crucial. In this guide, we’ll delve into the steps and the specific tool needed for this job. Stick with us to become proficient in removing bicycle centerlock rotors.
Introduction to removing bicycle centerlock rotors
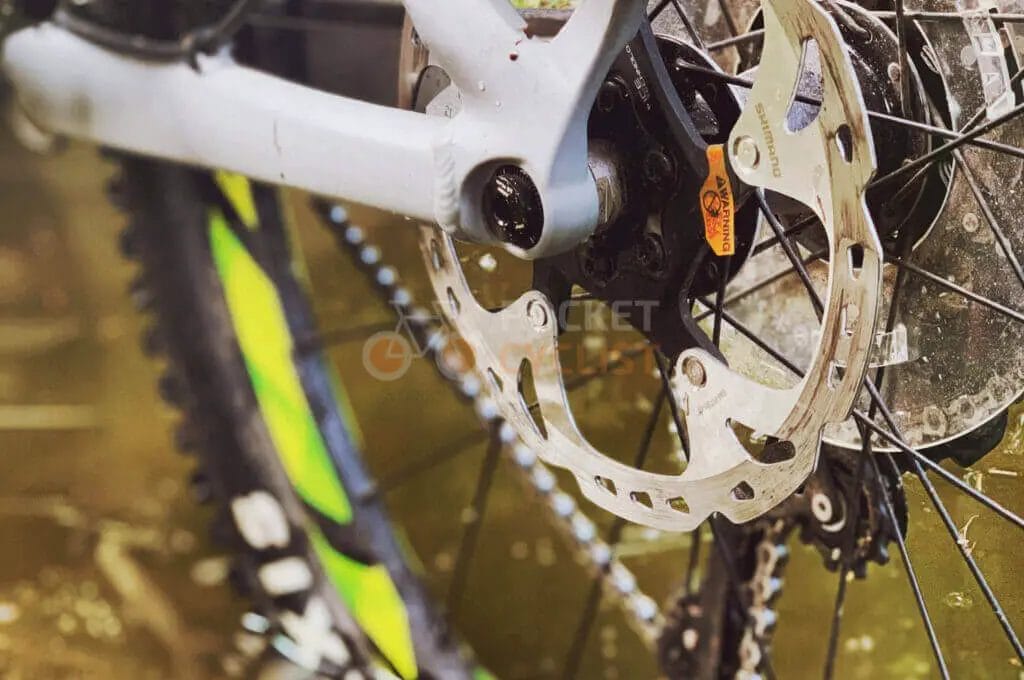
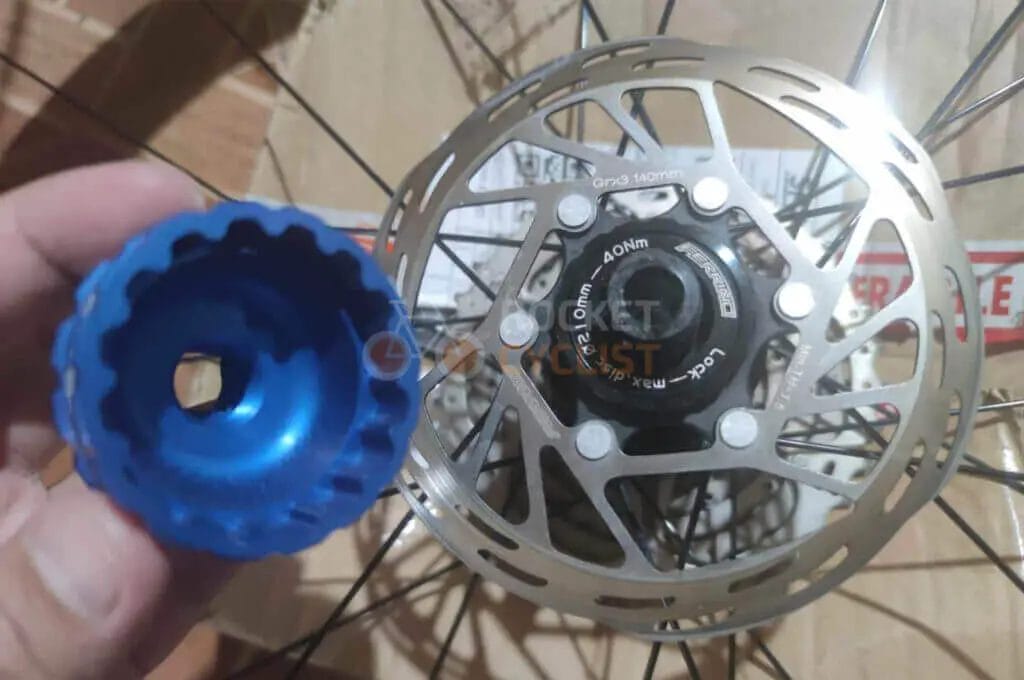
Centerlock rotors are a design patented by Shimano, and as such, they require a particular approach when you need to remove them. Unlike traditional six-bolt rotors, centerlocks are secured to the hub with a lockring. For this job, you’ll need a centerlock rotor tool. This specialized tool fits into the lockring’s notches and allows you to unscrew it with the leverage needed for a secure fit.
The importance of using the right tool for the job
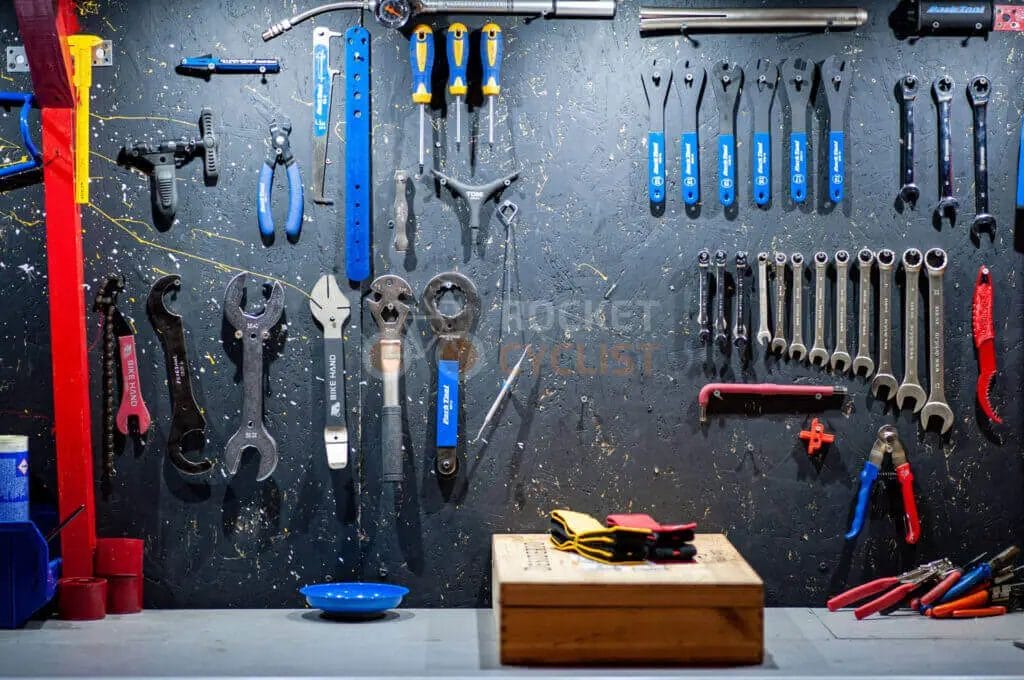
You might be tempted to improvise with tools at hand, but remember, using the correct centerlock rotor tool is paramount. Improper tools can damage the lockring, compromise the integrity of the rotor, and potentially lead to safety issues on the road. The centerlock rotor tool is designed to fit perfectly and often requires a wrench or a ratchet to turn it. In some models, it might look similar to a bottom bracket tool, but be sure to check compatibility. A precise fit ensures that you can apply adequate torque without slipping or stripping the notches. When dealing with your brakes, precision is non-negotiable. Always opt for the right tool, and your maintenance experience will be safer, quicker, and more effective.
Understanding Centerlock Rotors
What are centerlock rotors and how are they different from other types?
You’ll want to know about centerlock rotors, especially if you’re a cycling enthusiast interested in the mechanics of your bike. These rotors, as opposed to the six-bolt style, are uniquely designed to mount directly to the hub with a centerlock lockring. While the six-bolt system requires six individual bolts to hold the rotor in place, the centerlock system simplifies this by utilizing a single lockring, much like the system used on a camera lens. This design offers a cleaner appearance and a more straightforward mounting methodology. When it comes to removal, instead of dealing with six separate bolts, you just need to unlock the central ring to detach the rotor.
Remember, the specific tool you’ll need is the centerlock rotor tool—it’s essential due to the unique design of these rotors. So when you’re ready to undertake maintenance or replacement, ensure you’ve equipped yourself with this key piece of gear to avoid any hassle.
Advantages and disadvantages of centerlock rotors
Considering the design, centerlock rotors provide you with several advantages. The most apparent benefit is ease of installation and removal, thanks to the single lockring mechanism. This can save you precious time during bike maintenance sessions. The system also reduces the potential for rotor warping and ensures a uniform application of force, which can enhance your braking performance.
Despite these benefits, there are drawbacks too. If you’re already invested in a six-bolt wheelset, switching to a centerlock system requires new hubs or an adapter, which can incur additional cost. Plus, because centerlock rotors are less common than six-bolt ones, finding replacement parts while on a long tour or in remote areas might prove challenging. But, armed with the right knowledge and tools, you can weigh these factors to decide what’s best for your ride.
Tools for Removing Centerlock Rotors
Overview of the Tools Needed to Remove Centerlock Rotors
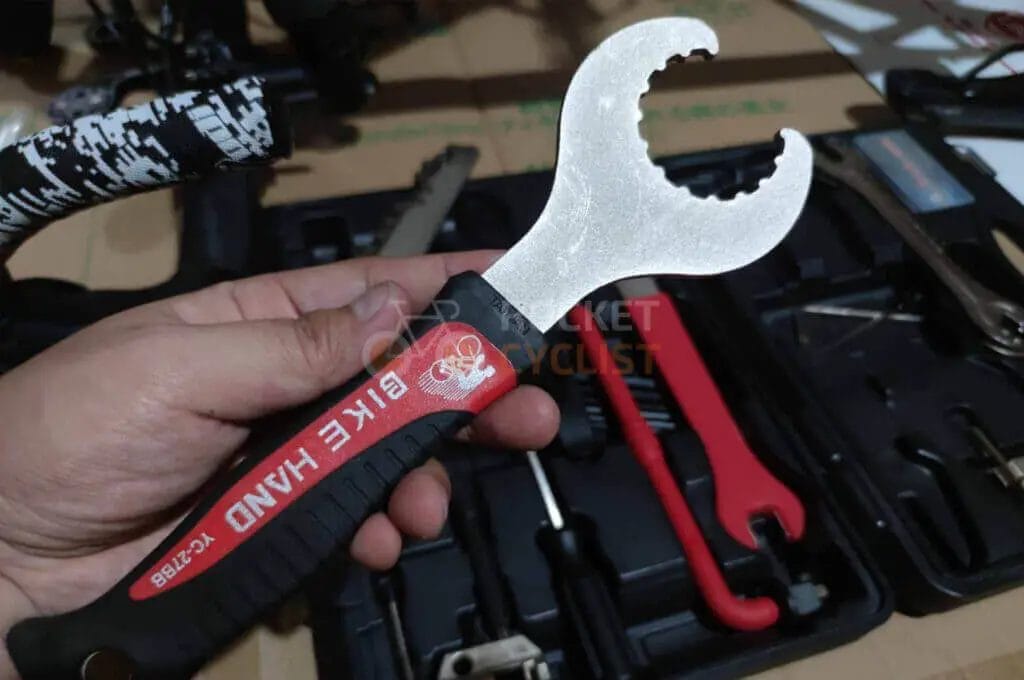
When it’s time to remove your bicycle’s centerlock rotors, either for maintenance or replacement, you must have the right tools to do the job effectively. The specialized tool you require is known as a centerlock rotor tool. This isn’t your regular wrench or screwdriver, but a specifically designed tool that fits into the centerlock’s lockring, allowing you to apply the necessary torque to release it.
Without this tool, you won’t be able to unlock the center part of the rotor from the hub. So, it’s indispensable that you add this to your kit. Most centerlock rotor tools are compatible with an adjustable wrench or a ratchet, which provides the leverage needed for the task. Additionally, a few centerlock systems may require a second tool to hold the hub in place, or alternatively, your bike needs to be secured to prevent the wheel from spinning.
Using a Centerlock Lockring Tool
To use the centerlock lockring tool, you’ll need to ensure your bike is properly supported, preventing any wheel movement. Place the tool into the slots of the lockring at the center of the rotor. Secure the tool with your adjustable wrench or ratchet—depending on the design of your tool—and turn counterclockwise. A bit of effort might be required if the lockring is particularly tight.
Do be cautious not to strip the lockring by using a mismatched tool or excessive force. Once it’s loosened, you can unscrew it by hand and carefully remove your rotor. Remember, when installing a new rotor, the process is simply reversed. Always adhere to the manufacturer’s specified torque setting to avoid damage to the rotor or hub.
Keeping the correct tools on hand will make the whole process smoother and ensure you’re back on the trail with little downtime. As with any maintenance task, if you are unsure or uncomfortable with the process, seek assistance from a professional bike mechanic.
Method 1: Using a Cassette Lockring Tool

Step-by-step guide on removing centerlock rotors using a cassette lockring tool
To remove bicycle centerlock rotors, you’ll generally require a cassette lockring tool, a wrench, or a ratchet that fits the tool. Here’s how to use it:
- Secure Your Bicycle: First, ensure your bike is stable and immobilized to prevent any movement. This might mean mounting it on a stand or flipping it over so it rests on the seat and handlebars.
- Locate the Lockring: Look for the lockring at the center of the rotor. It typically has external notches or an internal spline that the cassette lockring tool will fit into.
- Insert the Cassette Lockring Tool: Place the tool into the notches or internal spline. Make sure it’s seated properly to avoid slippage.
- Attach Wrench or Ratchet: Connect your adjustable wrench or ratchet to the cassette lockring tool. For most tools, you’ll turn it counterclockwise to loosen the lockring.
- Apply Pressure: Apply steady and firm pressure to the wrench or ratchet to loosen the lockring. If it’s too tight, you may need to use an extension bar for more leverage.
- Remove the Lockring and Rotor: Once the lockring is loose, you can usually unscrew it by hand. Carefully remove the lockring and then the rotor from the hub.
Tips and precautions for using a cassette lockring tool
Here are some tips and precautions to remember when using a centerlock rotor tool:
- Choose the Right Tool: Make sure you have the correct cassette lockring tool for your bike’s centerlock system. Using the wrong tool can damage the lockring and the tool itself.
- Don’t Force: If the lockring won’t budge, don’t force it. This could lead to stripped notches or a broken tool. Spray some penetrating oil around the lockring and let it sit to help loosen it.
- Keep It Straight: Ensure the tool is aligned properly and isn’t slipping or at an angle, as this could round off the lockring edges or damage the hub.
- Follow Torque Specifications: When reinstalling the rotor, make sure to tighten the lockring to the manufacturer’s recommended torque specification to ensure safety and prevent damage.
By following these steps and taking the necessary precautions, you can safely and efficiently remove your bike’s centerlock rotors. If at any point you’re unsure about the process, don’t hesitate to get in touch with a professional mechanic to avoid any potential issues.
Method 2: Using a Centerlock Rotor Removal Tool
For those bicycle enthusiasts or diligent mechanics aiming to remove centerlock rotors, the tool you need is a centerlock rotor removal tool. This specialized tool is specifically designed for the task, ensuring a smoother and more reliable operation compared to general tools.
Step-by-step guide on removing centerlock rotors using a centerlock rotor removal tool
Removing a centerlock rotor may initially seem daunting, but with the right tool in hand, the process is quite straightforward. Follow this step-by-step guide to remove your bike’s centerlock rotor confidently:
- Secure Your Bike: Begin by securing your bicycle in a stable position. You may use a bike stand or lay it down so that it won’t shift during the process.
- Identify the Lockring: Locate the centerlock ring in the middle of the rotor. The lockring will have a specific pattern that matches your centerlock rotor removal tool.
- Engage the Tool: Slide the centerlock rotor removal tool into the lockring ensuring that it fits snugly and is fully engaged.
- Loosen the Lockring: Using an appropriate wrench, turn the tool counterclockwise. You should feel the lockring begin to loosen—it may require some force, so be prepared to apply a significant amount of pressure.
- Detach the Rotor: Once the lockring is loosened, you’ll be able to spin it off by hand. Remove both the lockring and the rotor with care.
Tips and precautions for using a centerlock rotor removal tool
A few tips can help ensure that you remove your centerlock rotor safely and without damaging your equipment:
- Correct Tool: Always use a centerlock rotor removal tool that is designed for your specific bike’s rotor system. An improper tool can cause damage.
- Steady Force: Never jerk or yank the tool; apply steady pressure to prevent the tool from slipping and potentially causing injury or damage to the bike.
- Tool Maintenance: Keep your tools in good condition. A worn or damaged tool is more likely to fail and could damage the lockring.
- Know Your Limits: If you are having trouble loosening the lockring, or if something doesn’t feel right, don’t hesitate to consult or hire a professional mechanic.
By carefully following these steps and tips, you can efficiently remove and replace centerlock rotors using a centerlock rotor removal tool. Always prioritize safety and tool compatibility, and you’ll master this maintenance skill in no time.
Alternative Methods
If you find yourself without a centerlock rotor removal tool, fret not. There are alternative methods that may help you get the job done. Keep in mind, while these alternatives can offer a temporary solution, they’re generally not recommended as they can damage your bicycle’s components. So use these methods with caution and at your own risk.
Exploring other methods for removing centerlock rotors
For the resourceful cyclist, when specialized tools are not available, you might consider using a universal chain whip in combination with an adjustable wrench. The chain whip grips the cassette enabling you to apply counter-torque, while the adjustable wrench turns the lockring. Another method involves using a pair of needle-nose pliers. However, this requires a steady hand and a lot of care to avoid slipping and rounding off the lockring notches.
Using a hammer and punch as an alternative
In situations where you’re left with no other option and need to remove the centerlock rotor, you can attempt to use a hammer and punch. This method should be considered as a last resort because it has a higher risk of causing damage. To do this, you’ll need to position the punch against one of the notches on the lockring. Applying a small amount of force at a time, gently tap the punch with your hammer in a counterclockwise direction, slowly loosening the lockring. Be patient and careful with each tap to avoid deforming the lockring.
Remember, while these makeshift methods can work, they could potentially lead to costly repairs if used improperly. Whenever possible, stick to using the proper centerlock rotor removal tool, designed specifically for the task, to ensure that your maintenance endeavor is both safe and successful.
Common Mistakes to Avoid
When dealing with the removal of bicycle centerlock rotors, it’s vital to avoid common errors that could lead to damaging your bike. The correct tools and techniques are essential to ensure a safe and effective removal process.
Common mistakes to avoid when removing centerlock rotors
Firstly, you might be tempted to use inappropriate tools in place of a centerlock rotor removal tool. While they might seem like they fit the bill, these tools often lead to damaged components, including stripped lockring notches or a damaged hub. Another blunder is applying excessive force; this can deform the rotor and turn a simple removal into an expensive fix. Also, don’t forget to disengage the quick release or thru-axle before attempting to remove the lockring – overlooking this step can make removal unnecessarily difficult.
Tips for preventing damage to the rotor and hub
Prevention is always better than cure. To steer clear of harm, use the centerlock rotor removal tool that’s right for your bike. Make sure the tool engages fully with the lockring to avoid slippage. Apply force steadily and evenly; if the lockring is particularly stubborn, some penetrating oil can help loosen it. Lastly, always hold the rotor stable while you apply torque to the lockring. This prevents warping the rotor and ensures a smooth, damage-free removal process. By remaining mindful of your approach and using appropriate tools, you can remove the centerlock rotors without any mishaps.
Maintenance and Care

When taking care of your bicycle’s centerlock rotors, it’s crucial to use the right tools to both maintain their condition and undertake any necessary repairs. Let’s delve into some tips that will help you keep your centerlock rotors in top shape.
Tips for maintaining and caring for centerlock rotors
To maintain your centerlock rotors, you should regularly inspect them for wear and tear. Look for any warping, excessive wear, or rust that could compromise their performance. If you do find your rotors have become warped or bent, it’s advisable to replace them, as straightening them out isn’t a reliable fix. When tightening the lockring, use a torque wrench to ensure that you’re applying the correct amount of pressure, as specified by the rotor or hub manufacturer. This will prevent over-tightening, which can damage both the rotor and the hub.
Cleaning and lubricating the centerlock interface
Keeping the centerlock interface clean and well-lubricated is also vital to the maintenance process. Dirt and grime can cause corrosion and affect the engagement between the hub and the rotor. Clean around the centerlock periodically with a mild solvent and a soft brush to remove any build-up. After cleaning, apply a thin layer of bicycle-specific lubricant to the interface to reduce friction and protect against rust. However, be careful not to over-lubricate, as excess oil can attract more dirt or even contaminate the brake pads, reducing their effectiveness.
By following these tips, using the right tools, and sticking to a regular maintenance routine, you can extend the lifespan of your centerlock rotors and ensure your bike’s braking system remains reliable and efficient.
Conclusion
Summary of the different tools and methods for removing centerlock rotors
To remove your bicycle’s centerlock rotors effectively, you need the appropriate tools for a hassle-free and safe operation. A centerlock rotor tool, resembling a large lockring tool, is designed to fit into the grooves of the centerlock system. This specific tool is crucial because it allows you to unscrew the lockring that holds the rotor in place. For certain models, you may need a compatible cassette lockring tool. Always check the manufacturer’s instructions to determine the correct tool required.
In addition to the lockring tool, you should also have an adjustable wrench or a specific wrench size that fits your lockring tool. An alternative option for newer Shimano centerlock rotors is the use of an external bottom bracket (BB) tool. To prevent damage to the delicate parts of your bike, use a torque wrench when applying force to the lockring, ensuring that you stick to the recommended torque settings provided by the rotor and hub manufacturer.
Final thoughts and recommendations for safely removing centerlock rotors
In conclusion, correctly removing centerlock rotors ensures the longevity and performance of your bicycle. Always use the designated centerlock rotor tool, adjustable wrench, or BB tool, and couple it with a torque wrench to avoid overtightening. Remember, the right application of force when engaging or disengaging the lockring is imperative to maintain your bike’s parts in tiptop condition. For the safest and most efficient removal, follow the manufacturer’s guide and invest in quality tools that will serve you reliably over time. By adhering to these recommendations, you’ll keep your biking experience safe and enjoyable.
Getting into the intricacies of bicycle maintenance, sooner or later you’ll face the task of removing centerlock rotors. Whether you’re replacing worn discs or upgrading your braking system, doing it right is crucial. In this guide, we’ll delve into the steps and the specific tool needed for this job. Stick with us to become proficient in removing bicycle centerlock rotors.
Introduction to removing bicycle centerlock rotors
Centerlock rotors are a design patented by Shimano, and as such, they require a particular approach when you need to remove them. Unlike traditional six-bolt rotors, centerlocks are secured to the hub with a lockring. For this job, you’ll need a centerlock rotor tool. This specialized tool fits into the lockring’s notches and allows you to unscrew it with the leverage needed for a secure fit.
The importance of using the right tool for the job
You might be tempted to improvise with tools at hand, but remember, using the correct centerlock rotor tool is paramount. Improper tools can damage the lockring, compromise the integrity of the rotor, and potentially lead to safety issues on the road. The centerlock rotor tool is designed to fit perfectly and often requires a wrench or a ratchet to turn it. In some models, it might look similar to a bottom bracket tool, but be sure to check compatibility. A precise fit ensures that you can apply adequate torque without slipping or stripping the notches. When dealing with your brakes, precision is non-negotiable. Always opt for the right tool, and your maintenance experience will be safer, quicker, and more effective.
Understanding Centerlock Rotors
What are centerlock rotors and how are they different from other types?
You’ll want to know about centerlock rotors, especially if you’re a cycling enthusiast interested in the mechanics of your bike. These rotors, as opposed to the six-bolt style, are uniquely designed to mount directly to the hub with a centerlock lockring. While the six-bolt system requires six individual bolts to hold the rotor in place, the centerlock system simplifies this by utilizing a single lockring, much like the system used on a camera lens. This design offers a cleaner appearance and a more straightforward mounting methodology. When it comes to removal, instead of dealing with six separate bolts, you just need to unlock the central ring to detach the rotor.
Remember, the specific tool you’ll need is the centerlock rotor tool—it’s essential due to the unique design of these rotors. So when you’re ready to undertake maintenance or replacement, ensure you’ve equipped yourself with this key piece of gear to avoid any hassle.
Advantages and disadvantages of centerlock rotors
Considering the design, centerlock rotors provide you with several advantages. The most apparent benefit is ease of installation and removal, thanks to the single lockring mechanism. This can save you precious time during bike maintenance sessions. The system also reduces the potential for rotor warping and ensures a uniform application of force, which can enhance your braking performance.
Despite these benefits, there are drawbacks too. If you’re already invested in a six-bolt wheelset, switching to a centerlock system requires new hubs or an adapter, which can incur additional cost. Plus, because centerlock rotors are less common than six-bolt ones, finding replacement parts while on a long tour or in remote areas might prove challenging. But, armed with the right knowledge and tools, you can weigh these factors to decide what’s best for your ride.
Tools for Removing Centerlock Rotors
Overview of the Tools Needed to Remove Centerlock Rotors
When it’s time to remove your bicycle’s centerlock rotors, either for maintenance or replacement, you must have the right tools to do the job effectively. The specialized tool you require is known as a centerlock rotor tool. This isn’t your regular wrench or screwdriver, but a specifically designed tool that fits into the centerlock’s lockring, allowing you to apply the necessary torque to release it.
Without this tool, you won’t be able to unlock the center part of the rotor from the hub. So, it’s indispensable that you add this to your kit. Most centerlock rotor tools are compatible with an adjustable wrench or a ratchet, which provides the leverage needed for the task. Additionally, a few centerlock systems may require a second tool to hold the hub in place, or alternatively, your bike needs to be secured to prevent the wheel from spinning.
Using a Centerlock Lockring Tool
To use the centerlock lockring tool, you’ll need to ensure your bike is properly supported, preventing any wheel movement. Place the tool into the slots of the lockring at the center of the rotor. Secure the tool with your adjustable wrench or ratchet—depending on the design of your tool—and turn counterclockwise. A bit of effort might be required if the lockring is particularly tight.
Do be cautious not to strip the lockring by using a mismatched tool or excessive force. Once it’s loosened, you can unscrew it by hand and carefully remove your rotor. Remember, when installing a new rotor, the process is simply reversed. Always adhere to the manufacturer’s specified torque setting to avoid damage to the rotor or hub.
Keeping the correct tools on hand will make the whole process smoother and ensure you’re back on the trail with little downtime. As with any maintenance task, if you are unsure or uncomfortable with the process, seek assistance from a professional bike mechanic.
Method 1: Using a Cassette Lockring Tool
Step-by-step guide on removing centerlock rotors using a cassette lockring tool
To remove bicycle centerlock rotors, you’ll generally require a cassette lockring tool, a wrench, or a ratchet that fits the tool. Here’s how to use it:
- Secure Your Bicycle: First, ensure your bike is stable and immobilized to prevent any movement. This might mean mounting it on a stand or flipping it over so it rests on the seat and handlebars.
- Locate the Lockring: Look for the lockring at the center of the rotor. It typically has external notches or an internal spline that the cassette lockring tool will fit into.
- Insert the Cassette Lockring Tool: Place the tool into the notches or internal spline. Make sure it’s seated properly to avoid slippage.
- Attach Wrench or Ratchet: Connect your adjustable wrench or ratchet to the cassette lockring tool. For most tools, you’ll turn it counterclockwise to loosen the lockring.
- Apply Pressure: Apply steady and firm pressure to the wrench or ratchet to loosen the lockring. If it’s too tight, you may need to use an extension bar for more leverage.
- Remove the Lockring and Rotor: Once the lockring is loose, you can usually unscrew it by hand. Carefully remove the lockring and then the rotor from the hub.
Tips and precautions for using a cassette lockring tool
Here are some tips and precautions to remember when using a centerlock rotor tool:
- Choose the Right Tool: Make sure you have the correct cassette lockring tool for your bike’s centerlock system. Using the wrong tool can damage the lockring and the tool itself.
- Don’t Force: If the lockring won’t budge, don’t force it. This could lead to stripped notches or a broken tool. Spray some penetrating oil around the lockring and let it sit to help loosen it.
- Keep It Straight: Ensure the tool is aligned properly and isn’t slipping or at an angle, as this could round off the lockring edges or damage the hub.
- Follow Torque Specifications: When reinstalling the rotor, make sure to tighten the lockring to the manufacturer’s recommended torque specification to ensure safety and prevent damage.
By following these steps and taking the necessary precautions, you can safely and efficiently remove your bike’s centerlock rotors. If at any point you’re unsure about the process, don’t hesitate to get in touch with a professional mechanic to avoid any potential issues.
Method 2: Using a Centerlock Rotor Removal Tool
For those bicycle enthusiasts or diligent mechanics aiming to remove centerlock rotors, the tool you need is a centerlock rotor removal tool. This specialized tool is specifically designed for the task, ensuring a smoother and more reliable operation compared to general tools.
Step-by-step guide on removing centerlock rotors using a centerlock rotor removal tool
Removing a centerlock rotor may initially seem daunting, but with the right tool in hand, the process is quite straightforward. Follow this step-by-step guide to remove your bike’s centerlock rotor confidently:
- Secure Your Bike: Begin by securing your bicycle in a stable position. You may use a bike stand or lay it down so that it won’t shift during the process.
- Identify the Lockring: Locate the centerlock ring in the middle of the rotor. The lockring will have a specific pattern that matches your centerlock rotor removal tool.
- Engage the Tool: Slide the centerlock rotor removal tool into the lockring ensuring that it fits snugly and is fully engaged.
- Loosen the Lockring: Using an appropriate wrench, turn the tool counterclockwise. You should feel the lockring begin to loosen—it may require some force, so be prepared to apply a significant amount of pressure.
- Detach the Rotor: Once the lockring is loosened, you’ll be able to spin it off by hand. Remove both the lockring and the rotor with care.
Tips and precautions for using a centerlock rotor removal tool
A few tips can help ensure that you remove your centerlock rotor safely and without damaging your equipment:
- Correct Tool: Always use a centerlock rotor removal tool that is designed for your specific bike’s rotor system. An improper tool can cause damage.
- Steady Force: Never jerk or yank the tool; apply steady pressure to prevent the tool from slipping and potentially causing injury or damage to the bike.
- Tool Maintenance: Keep your tools in good condition. A worn or damaged tool is more likely to fail and could damage the lockring.
- Know Your Limits: If you are having trouble loosening the lockring, or if something doesn’t feel right, don’t hesitate to consult or hire a professional mechanic.
By carefully following these steps and tips, you can efficiently remove and replace centerlock rotors using a centerlock rotor removal tool. Always prioritize safety and tool compatibility, and you’ll master this maintenance skill in no time.
Alternative Methods
If you find yourself without a centerlock rotor removal tool, fret not. There are alternative methods that may help you get the job done. Keep in mind, while these alternatives can offer a temporary solution, they’re generally not recommended as they can damage your bicycle’s components. So use these methods with caution and at your own risk.
Exploring other methods for removing centerlock rotors
For the resourceful cyclist, when specialized tools are not available, you might consider using a universal chain whip in combination with an adjustable wrench. The chain whip grips the cassette enabling you to apply counter-torque, while the adjustable wrench turns the lockring. Another method involves using a pair of needle-nose pliers. However, this requires a steady hand and a lot of care to avoid slipping and rounding off the lockring notches.
Using a hammer and punch as an alternative
In situations where you’re left with no other option and need to remove the centerlock rotor, you can attempt to use a hammer and punch. This method should be considered as a last resort because it has a higher risk of causing damage. To do this, you’ll need to position the punch against one of the notches on the lockring. Applying a small amount of force at a time, gently tap the punch with your hammer in a counterclockwise direction, slowly loosening the lockring. Be patient and careful with each tap to avoid deforming the lockring.
Remember, while these makeshift methods can work, they could potentially lead to costly repairs if used improperly. Whenever possible, stick to using the proper centerlock rotor removal tool, designed specifically for the task, to ensure that your maintenance endeavor is both safe and successful.
Common Mistakes to Avoid
When dealing with the removal of bicycle centerlock rotors, it’s vital to avoid common errors that could lead to damaging your bike. The correct tools and techniques are essential to ensure a safe and effective removal process.
Common mistakes to avoid when removing centerlock rotors
Firstly, you might be tempted to use inappropriate tools in place of a centerlock rotor removal tool. While they might seem like they fit the bill, these tools often lead to damaged components, including stripped lockring notches or a damaged hub. Another blunder is applying excessive force; this can deform the rotor and turn a simple removal into an expensive fix. Also, don’t forget to disengage the quick release or thru-axle before attempting to remove the lockring – overlooking this step can make removal unnecessarily difficult.
Tips for preventing damage to the rotor and hub
Prevention is always better than cure. To steer clear of harm, use the centerlock rotor removal tool that’s right for your bike. Make sure the tool engages fully with the lockring to avoid slippage. Apply force steadily and evenly; if the lockring is particularly stubborn, some penetrating oil can help loosen it. Lastly, always hold the rotor stable while you apply torque to the lockring. This prevents warping the rotor and ensures a smooth, damage-free removal process. By remaining mindful of your approach and using appropriate tools, you can remove the centerlock rotors without any mishaps.
Maintenance and Care
When taking care of your bicycle’s centerlock rotors, it’s crucial to use the right tools to both maintain their condition and undertake any necessary repairs. Let’s delve into some tips that will help you keep your centerlock rotors in top shape.
Tips for maintaining and caring for centerlock rotors
To maintain your centerlock rotors, you should regularly inspect them for wear and tear. Look for any warping, excessive wear, or rust that could compromise their performance. If you do find your rotors have become warped or bent, it’s advisable to replace them, as straightening them out isn’t a reliable fix. When tightening the lockring, use a torque wrench to ensure that you’re applying the correct amount of pressure, as specified by the rotor or hub manufacturer. This will prevent over-tightening, which can damage both the rotor and the hub.
Cleaning and lubricating the centerlock interface
Keeping the centerlock interface clean and well-lubricated is also vital to the maintenance process. Dirt and grime can cause corrosion and affect the engagement between the hub and the rotor. Clean around the centerlock periodically with a mild solvent and a soft brush to remove any build-up. After cleaning, apply a thin layer of bicycle-specific lubricant to the interface to reduce friction and protect against rust. However, be careful not to over-lubricate, as excess oil can attract more dirt or even contaminate the brake pads, reducing their effectiveness.
By following these tips, using the right tools, and sticking to a regular maintenance routine, you can extend the lifespan of your centerlock rotors and ensure your bike’s braking system remains reliable and efficient.
Conclusion
Summary of the different tools and methods for removing centerlock rotors
To remove your bicycle’s centerlock rotors effectively, you need the appropriate tools for a hassle-free and safe operation. A centerlock rotor tool, resembling a large lockring tool, is designed to fit into the grooves of the centerlock system. This specific tool is crucial because it allows you to unscrew the lockring that holds the rotor in place. For certain models, you may need a compatible cassette lockring tool. Always check the manufacturer’s instructions to determine the correct tool required.
In addition to the lockring tool, you should also have an adjustable wrench or a specific wrench size that fits your lockring tool. An alternative option for newer Shimano centerlock rotors is the use of an external bottom bracket (BB) tool. To prevent damage to the delicate parts of your bike, use a torque wrench when applying force to the lockring, ensuring that you stick to the recommended torque settings provided by the rotor and hub manufacturer.
Final thoughts and recommendations for safely removing centerlock rotors
In conclusion, correctly removing centerlock rotors ensures the longevity and performance of your bicycle. Always use the designated centerlock rotor tool, adjustable wrench, or BB tool, and couple it with a torque wrench to avoid overtightening. Remember, the right application of force when engaging or disengaging the lockring is imperative to maintain your bike’s parts in tiptop condition. For the safest and most efficient removal, follow the manufacturer’s guide and invest in quality tools that will serve you reliably over time. By adhering to these recommendations, you’ll keep your biking experience safe and enjoyable.